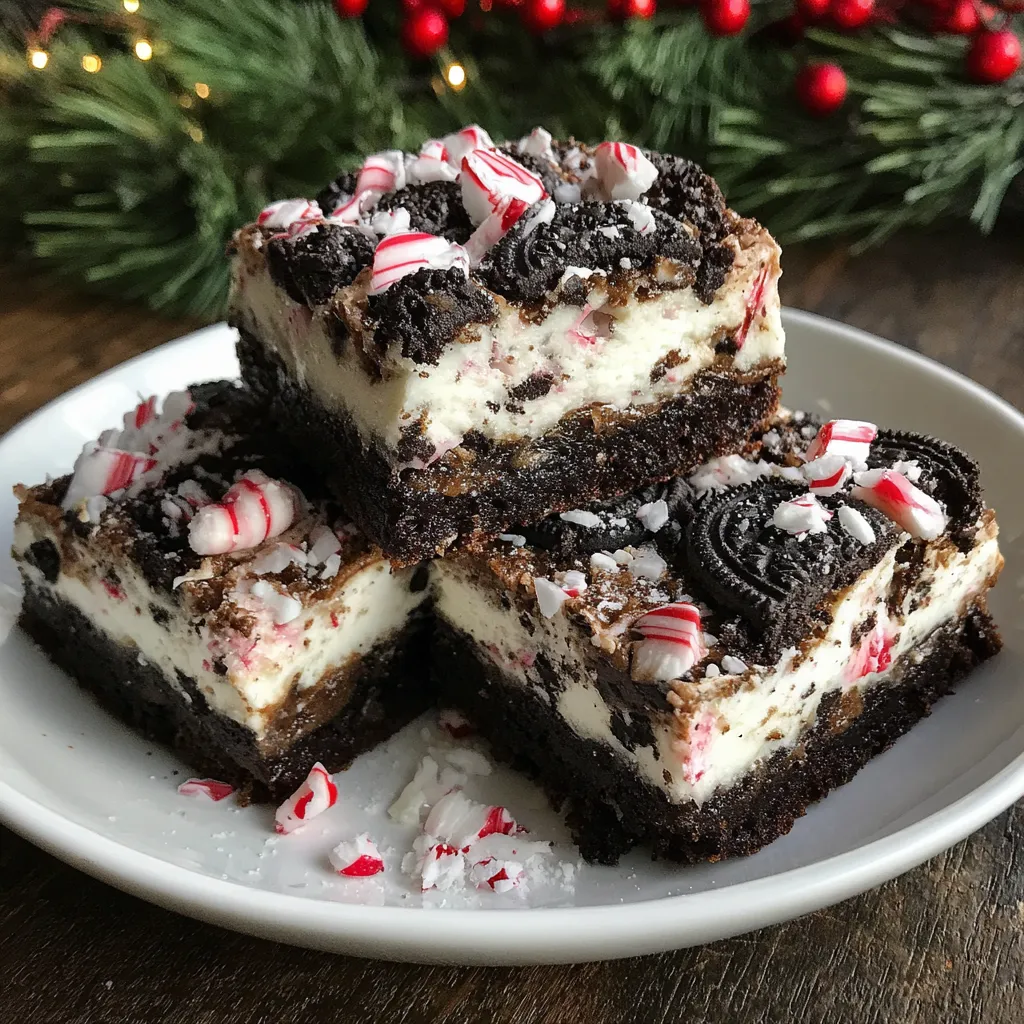
Peppermint Holiday Bars are more than a seasonal treat. They’re a confident crowd-pleaser that fits a busy life. I’m a chef behind Cookeroni. I design recipes with speed, texture, and trust in mind. Weeknights feel calmer, and holiday trays look spectacular. This bar starts with an Oreo crust. Then it folds in a silky peppermint filling. It finishes with a glossy chocolate topping. Crushed candy canes add sparkle. It’s ideal for gifting or sharing on a cookie tray. Assemble ahead, slice cleanly, and watch these lush bites disappear. My kitchen philosophy—balance, flavor, and efficiency—shines in this festive favorite.
Table of Contents
What makes Peppermint Holiday Bars special
Peppermint Holiday Bars are the dessert I reach for when life feels busy but I crave cheer. I love that they come together fast without skimping on flavor. This treat blends a sturdy Oreo crust, a silky peppermint filling, and a glossy chocolate top into something magical.
They travel well on cookie trays and make gifting feel effortless. The peppermint zing, creamy texture, and candy-cane crunch spark joy at every bite. Best of all, you can make them a day ahead, saving time on the big day.
Peppermint Holiday Bars: Oreo crust and peppermint cream
For the crust, I crush 24 Oreo cookies into fine crumbs and mix in melted butter until it looks like chocolate sand. I press it firmly into an 8×8 pan and bake it for 8 minutes to set. When it comes out, the crust stays sturdy enough to hold the filling without crumbling.
The filling starts with softened cream cheese, powdered sugar, and peppermint extract, folded with whipped topping. If you like a festive touch, tint a portion pink with a drop or two of red food coloring. Swirl the pink into the white for a merry marbling that hints at peppermint without being loud.
A glossy topping with candy cane crunch
Melt semi-sweet chocolate chips with butter and a splash of heavy cream until silky. Pour over the peppermint layer and spread evenly for a glossy, ribbon-like top. While it’s still warm, sprinkle crushed candy canes over the surface for sparkle.
Make-ahead, gift-ready presentation
These bars chill beautifully, so you can assemble a day ahead and save time. Slice after the chill for clean edges, then arrange on a tray with parchment between layers. Wrap with clear wrap or gift boxes to create a ready-to-give treat that looks as good as it tastes.
Why You’ll Love Peppermint Holiday Bars
Peppermint Holiday Bars deliver big flavor fast.
I love a dessert that stacks up in minutes and still feels special.
This bar system fits busy nights, gifting, and holiday trays alike.
Peppermint Holiday Bars: Busy-friendly layering
Busy-friendly layering keeps Peppermint Holiday Bars moving.
Crust, filling, and topping align like clockwork.
I love how steps stack up without crowding the kitchen.
Flavor that feels festive and sophisticated
Flavor feels festive and sophisticated, not fussy.
Peppermint Holiday Bars give a bright peppermint kick with creamy texture.
They taste special yet stay approachable for busy lives.
Ingredients
Here’s everything you’ll gather to build the layers of Peppermint Holiday Bars. I keep the list straightforward so you can shop quickly and bake with confidence. I’ll share quick substitutions so you can adapt to what you have on hand.
What you’ll need at a glance
- 24 Oreo cookies, crushed (about 2 cups crumbs)
- ¼ cup melted butter
- 8 oz cream cheese, softened
- 1 cup powdered sugar
- ½ tsp peppermint extract
- 1 cup whipped topping (or whipped cream)
- 4–5 drops red food coloring (optional for a pink swirl)
- 1 cup semi-sweet chocolate chips
- 2 tbsp butter
- 2 tbsp heavy cream
- ¼ cup crushed candy canes or peppermint candies
Exact quantities are listed at the bottom for printing and quick reference.
Ingredient spotlight and substitutions
- Oreo cookies: 24 cookies, crushed. They form the sturdy crust I rely on. Substitutions: any chocolate sandwich cookies, gluten-free chocolate cookies, or even graham crackers if you want a different texture.
- Melted butter: ¼ cup. It binds the crust. Substitutions: melted coconut oil or a dairy-free butter blend.
- Cream cheese: 8 oz, softened. It gives the creamy filling its structure. Substitutions: Neufchatel or a dairy-free cream cheese for a dairy-free option.
- Powdered sugar: 1 cup. It sweetens and smooths the filling. Substitutions: blitz granulated sugar with a pinch of cornstarch to imitate powdered sugar.
- Peppermint extract: ½ tsp. A bright peppermint punch. Substitutions: use ¼ tsp peppermint oil (careful, a drop goes a long way) or omit for a milder flavor.
- Whipped topping: 1 cup. Adds lightness. Substitutions: dairy-free whipped topping or whipped cream for a lighter, dairy-based texture.
- Red food coloring: 4–5 drops (optional). For a festive pink swirl. Omit if you prefer classic white.
- Semi-sweet chocolate chips: 1 cup. Creates the glossy top. Substitutions: dairy-free chocolate chips or a dark chocolate variation.
- Butter (for topping): 2 tbsp. Helps the chocolate shine. Substitutions: dairy-free butter or coconut oil.
- Heavy cream: 2 tbsp. Keeps the topping silky. Substitutions: dairy-free creamer or coconut cream (use a bit more for extra silk).
- Crushed candy canes or peppermint candies: ¼ cup. Gives peppermint crunch and sparkle. Substitutions: crushed hard peppermint candies or starlight mints.

How to Make Peppermint Holiday Bars
Here’s the step-by-step approach I use in my kitchen to build these multi-layer bars. Each stage keeps the process simple, so you can bake with confidence even on a busy day. The result is a dessert that’s creamy, festive, and easy to portion for gifting or trays.
Step 1 – Peppermint Holiday Bars Crust
Preheat the oven to 350°F (175°C). Line an 8×8-inch pan with parchment so the bars lift out neatly.
Crush 24 Oreo cookies into fine crumbs. Stir in ¼ cup melted butter until the mixture resembles wet sand.
Press the crust in an even layer on the pan bottom. Bake 8 minutes to set, then let it cool completely before filling.
Step 2 – Peppermint Holiday Bars Filling
Beat 8 oz cream cheese until smooth and creamy.
Stir in 1 cup powdered sugar and ½ tsp peppermint extract until fluffy.
Fold in 1 cup whipped topping until light. If you want a pink swirl, reserve a portion and tint with red food coloring.
Step 3 – Peppermint Holiday Bars Swirl (optional pink swirl)
Spread the white filling over the cooled crust in an even layer.
Dollop the pink filling in together with the white, then swirl gently with a knife to create a festive marble effect.
Step 4 – Peppermint Holiday Bars Chill and set
Refrigerate the bars for at least 30 minutes to firm the filling and make clean cuts easier.
If you’re pressed for time, you can chill in the freezer for 15 minutes, but watch so it doesn’t harden too much.
Step 5 – Peppermint Holiday Bars Topping and final chill
Melt 1 cup semi-sweet chocolate chips with 2 tbsp butter and 2 tbsp heavy cream until smooth.
Pour the topping over the peppermint layer and spread evenly for a glossy finish. Immediately sprinkle ¼ cup crushed candy canes on top and press lightly.
Chill 1–2 hours until the chocolate is set, then slice into bars with clean edges.

Tips for Success
Flavor and texture tips
- Keep ingredients at room temp for smooth mixing.
- Gently fold whipped topping to keep filling light.
- Wipe the knife between cuts for clean edges.
- Don’t skip parchment; it helps lift cleanly.
Timing and temperature hacks
- Chill between layers for 30 minutes to set firmly.
- If pressed, chill 15 minutes in the freezer, watch closely.
- Warm bars 10 minutes before slicing for easier cuts.
- Plan extra chilling if your fridge runs warm.
Equipment Needed
Essential tools
- 8×8-inch baking pan, parchment lined
- Mixing bowls (various sizes)
- Electric mixer or stand mixer
- Rubber spatula, whisk, offset spatula
- Microwave-safe bowl or small saucepan for topping
- Cooling rack and a sharp knife
- Measuring cups and spoons
Substitutes and handy accessories
- Similar-size pan (9×9 or square) with a shorter bake time
- Parchment substitute: aluminum foil with nonstick spray
- No mixer? Use a sturdy whisk and room-temp cream cheese
- Melting topping: microwave in short bursts; or use a double boiler
- Offset spatula or a silicone spatula for neat edges
Variations
Dairy-free and vegan option
- Make Peppermint Holiday Bars dairy-free by using dairy-free cream cheese and whipped topping.
- Replace butter with vegan butter or coconut oil in the crust and topping.
- Choose dairy-free cookies for the crust; verify labels for vegan compliance.
- Ensure the topping chocolate is dairy-free; look for certified vegan chocolate chips.
Gluten-free crust alternative
- Use gluten-free cookies (like gluten-free Oreos) for the crust.
- Check all ingredients in fillings and toppings to confirm gluten-free.
- The crust bakes 8 minutes and sets the same as the original.
- If using gluten-free cookies, you may press a bit firmer for sturdier bars.
Flavor twists
- Boost peppermint flavor with an extra 1/2 to 1 teaspoon extract.
- Add 1/2–1 teaspoon orange zest for a peppermint-orange twist.
- Top with chopped nuts, extra crushed candy canes, or a light white chocolate drizzle.
Peppermint Holiday Bars: Serving Ideas
Pair Peppermint Holiday Bars with hot cocoa, peppermint tea, or coffee for a cozy finish on busy days, perfect for holiday entertaining too.
Arrange on a white platter with parchment edges for easy cutting and gifting.
Offer a drizzle of white chocolate or a light dusting of cocoa for contrast.
Pairings and platter ideas
- Display with candy canes, mini sugar cookies, and a touch of evergreen for a festive tray.
- Set near a mug of cocoa or coffee for quick, crowd-pleasing serving.
Gift-ready presentation tips
- Wrap bars individually or stack them in decorative boxes with tissue.
- Label with a simple tag: “Peppermint Holiday Bars” and a best-by date.
Make-Ahead Tips for Peppermint Holiday Bars
Make-ahead and storage plan for best texture
I love planning ahead with Peppermint Holiday Bars. A little prep keeps flavors bright and textures crisp when time is tight.
- Make crust in advance: bake, cool completely, and store the crust in an airtight container at room temperature for up to 2 days, or refrigerate up to 3 days if your kitchen runs warm.
- Prepare filling ahead: beat the cream cheese with sugar and peppermint, then fold in whipped topping. Cover tightly and refrigerate up to 1 day before assembly.
- Assemble ahead, then chill: build crust and filling, wrap well, and refrigerate for up to 24 hours before topping. Do the topping on serving day for the gloss and crunch.
- Chill for clean slices: after topping, refrigerate at least 30 minutes. For best texture, plan to slice within 1–2 days of topping. The bars stay delicious for 3–5 days when stored cold.
Freezing, thawing, and transport tips
If you need to shuttle Peppermint Holiday Bars to a party, freezing is your friend. I freeze in short, manageable steps to protect the layers.
- Freeze whole or in portions: wrap the uncut pan tightly with plastic wrap, then foil. You can also freeze individual bars for easy grabbing.
- Storage time: up to 2–3 months for best texture and flavor.
- Thawing: thaw in the fridge overnight, or at room temperature for 30–60 minutes before slicing.
- Transport: keep bars cold in a cooler with an ice pack. If possible, slice after arrival to keep edges neat, or carry whole and slice on site.

FAQs
Can I freeze Peppermint Holiday Bars?
Yes. Peppermint Holiday Bars freeze beautifully. You can freeze the whole pan or individual bars. Wrap tightly in plastic, then foil, and freeze up to 2–3 months. Thaw in the fridge overnight, or at room temperature 30–60 minutes for slices with clean edges.
Can I make these ahead of time for a party?
Absolutely. Make crust and filling ahead, then chill. Assemble the topping on serving day to keep that glossy finish. Or chill the whole assembled tray for easier timing during a party.
Are these bars gluten-free or dairy-free?
Yes. You can make these gluten-free or dairy-free with simple swaps. Choose gluten-free cookies for the crust and gluten-free chocolate for the topping. Swap in dairy-free cream cheese and whipped topping for a dairy-free version. Always check labels to confirm dairy-free or vegan status.
How should I store and slice for clean edges?
Store bars cold. After topping, chill at least 30 minutes for clean edges. For neat slices, wipe your knife between cuts and use a long, sharp blade. If serving later, keep bars chilled and covered.
Final Thoughts
A festive finish you can rely on
Peppermint Holiday Bars bring holiday magic with minimal stress. I rely on them when I need a crowd-pleaser that doesn’t steal my day. I love how they look charming and taste lush. They travel well, gift-ready, and disappear fast. I stash extras in the freezer for last-minute sweet moments. Friends and family always cheer when they see Peppermint Holiday Bars on the tray.
Quick recap of tips and takeaway
Make the crust ahead, fill, then chill. Slice with a warm knife for neat edges. Keep bars cold until serving. These small steps save time on chaotic party days. And the aroma alone lifts the room.
Print
Peppermint Holiday Bars bring 12 easy, creamy, lush bites.
- Total Time: 2 hours 30 minutes
- Yield: 12–16 bars 1x
- Diet: Vegetarian
Description
Peppermint Holiday Bars are a festive, creamy treat with an Oreo crust, peppermint filling, and chocolate topping finished with crushed candy canes—perfect for holiday cookie trays and gifting.
Ingredients
- 24 Oreo cookies, crushed (about 2 cups crumbs)
- ¼ cup melted butter
- 8 oz cream cheese, softened
- 1 cup powdered sugar
- ½ tsp peppermint extract
- 1 cup whipped topping (or whipped cream)
- 4–5 drops red food coloring (optional for a pink swirl effect)
- 1 cup semi-sweet chocolate chips
- 2 tbsp butter
- 2 tbsp heavy cream
- ¼ cup crushed candy canes or peppermint candies
Instructions
- Preheat oven to 350°F (175°C). Line an 8×8-inch baking pan with parchment paper.
- In a bowl, mix crushed Oreos and melted butter until well combined. Press firmly into the bottom of the pan to form the crust. Bake for 8 minutes, then cool completely.
- In a large bowl, beat cream cheese until smooth. Add powdered sugar and peppermint extract; mix until creamy. Fold in whipped topping.
- Divide mixture in half and tint one portion light pink with food coloring (optional). Swirl the pink layer into the white layer for a festive look.
- Spread evenly over the cooled crust and chill in the refrigerator for at least 30 minutes.
- For the topping, melt chocolate chips, butter, and cream together until smooth. Pour over the peppermint layer and spread evenly.
- Sprinkle crushed candy canes over the top. Chill for another 1–2 hours before cutting into bars.
Notes
- Line the pan with parchment for easy removal.
- Chill times help set the layers for clean cuts.
- Optional pink swirl by tinting half of the filling with red food coloring.
- Store bars refrigerated; best within 3–5 days.
- Prep Time: 20 minutes
- Cook Time: 8 minutes
- Category: Dessert
- Method: Baking and Chilling
- Cuisine: American
Nutrition
- Serving Size: 1 bar
- Calories: 275
- Sugar: 23 g
- Sodium: 120 mg
- Fat: 16 g
- Saturated Fat: 9 g
- Unsaturated Fat: 6 g
- Trans Fat: 0 g
- Carbohydrates: 32 g
- Fiber: 0 g
- Protein: 4 g
- Cholesterol: 40 mg
Keywords: Peppermint Holiday Bars, Oreo crust, peppermint filling, chocolate topping, Christmas dessert, holiday bars, candy cane topping