
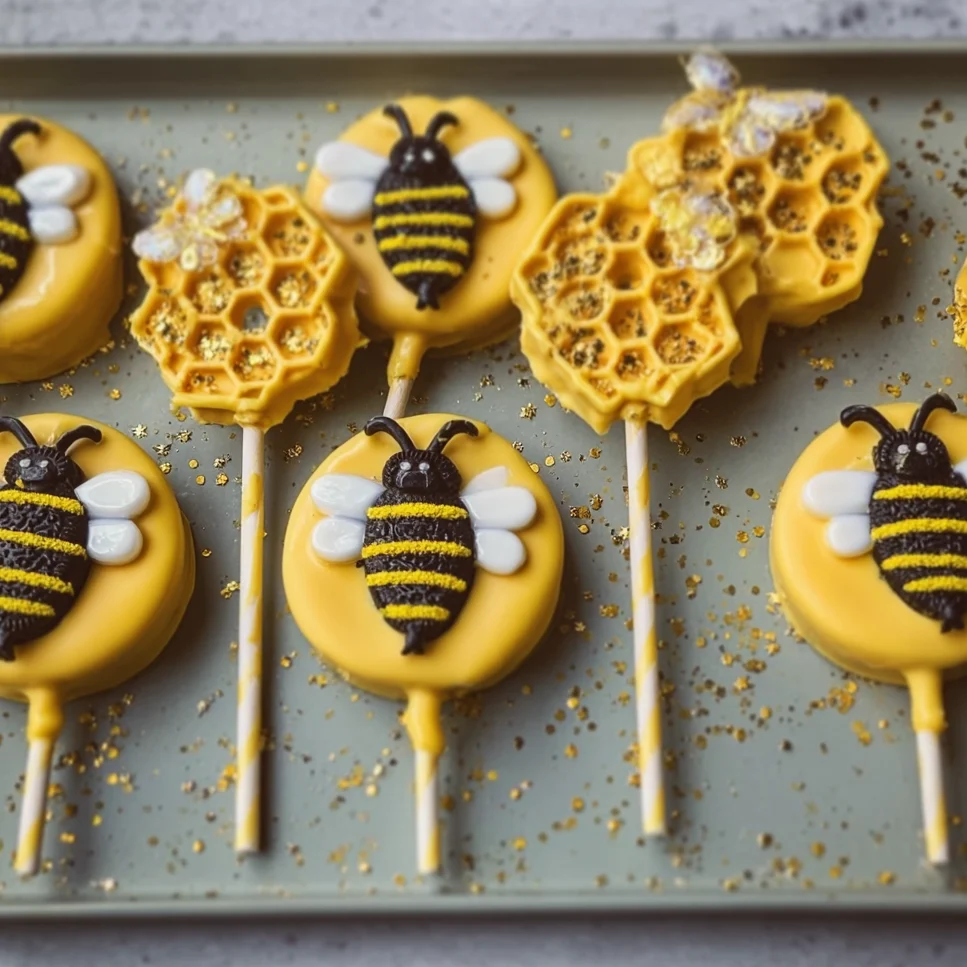
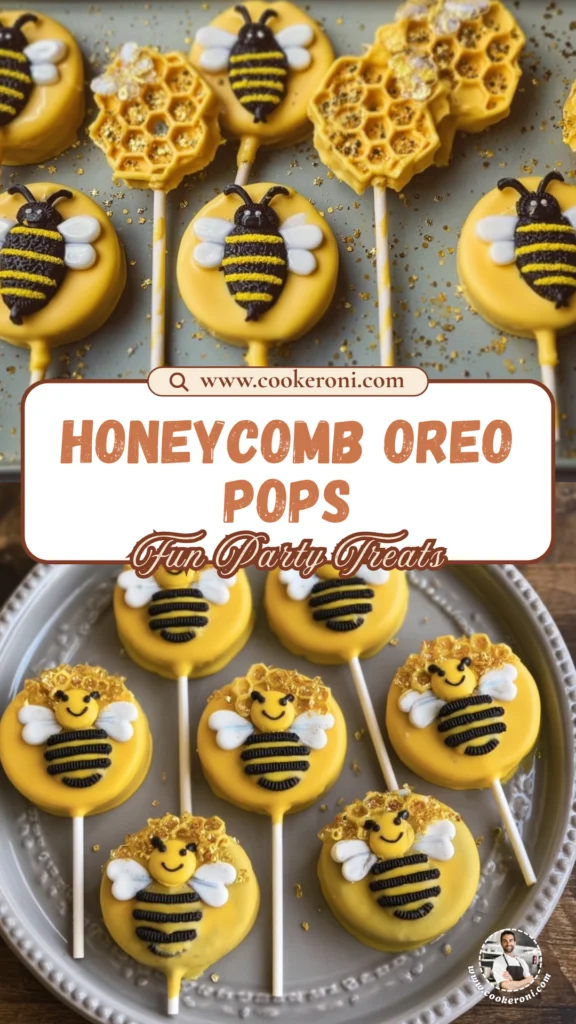
Honeycomb Oreo Pops are my go‑to party treat that brings a burst of color and sweetness to any celebration. I love how the crunchy Oreo cookie meets smooth yellow chocolate, and the fun bee and honeycomb decorations turn each bite into a whimsical work of art. In just minutes you can dip, decorate, and chill these pops, making them perfect for birthdays, holidays, or a simple weekend surprise for the kids. Follow my step‑by‑step guide and watch smiles appear. I love swapping chocolate colors and adding bright decorations; serve them on a platter or hand them out, and watch guests smile today.
Table of Contents
Why You’ll Love This Honeycomb Oreo Pops
These pops combine the nostalgic crunch of an Oreo with the glossy shine of melted chocolate, creating a texture contrast that is both satisfying and surprising. The bright yellow coating instantly catches the eye, making them ideal for themed parties, especially those with a bee or summer motif. Their bite‑size format means they are easy for guests to handle, reducing mess and encouraging sharing. Additionally, the recipe requires minimal equipment, so even a beginner baker can achieve professional‑looking results without stress.
Beyond aesthetics, the flavor profile hits all the right notes: the sweet, slightly bitter chocolate balances the creamy cookie filling, while the edible glitter and honeycomb accents add a playful sparkle. Because the treats are handheld, they are perfect for outdoor events, picnics, or any setting where plates and cutlery might be limited. And because they are made with simple pantry staples, you can whip up a batch on short notice without a long shopping trip.
Equipment You’ll Need
To create flawless Honeycomb Oreo Pops, gather the following tools. A microwave‑safe bowl for melting chocolate, a sturdy spatula for stirring, parchment‑lined baking sheets for setting, and a set of lollipop sticks to hold each pop. A small pastry brush helps apply a thin layer of chocolate for an even coat, while a decorative brush or toothpick can be used to attach the bee and honeycomb pieces. If you prefer a polished finish, a cooling rack allows the pops to set without touching the surface, preventing smudges.
- Microwave‑safe bowl
- Spatula
- Parchment paper
- Lollipop sticks
- Pastry brush
- Cooling rack (optional)
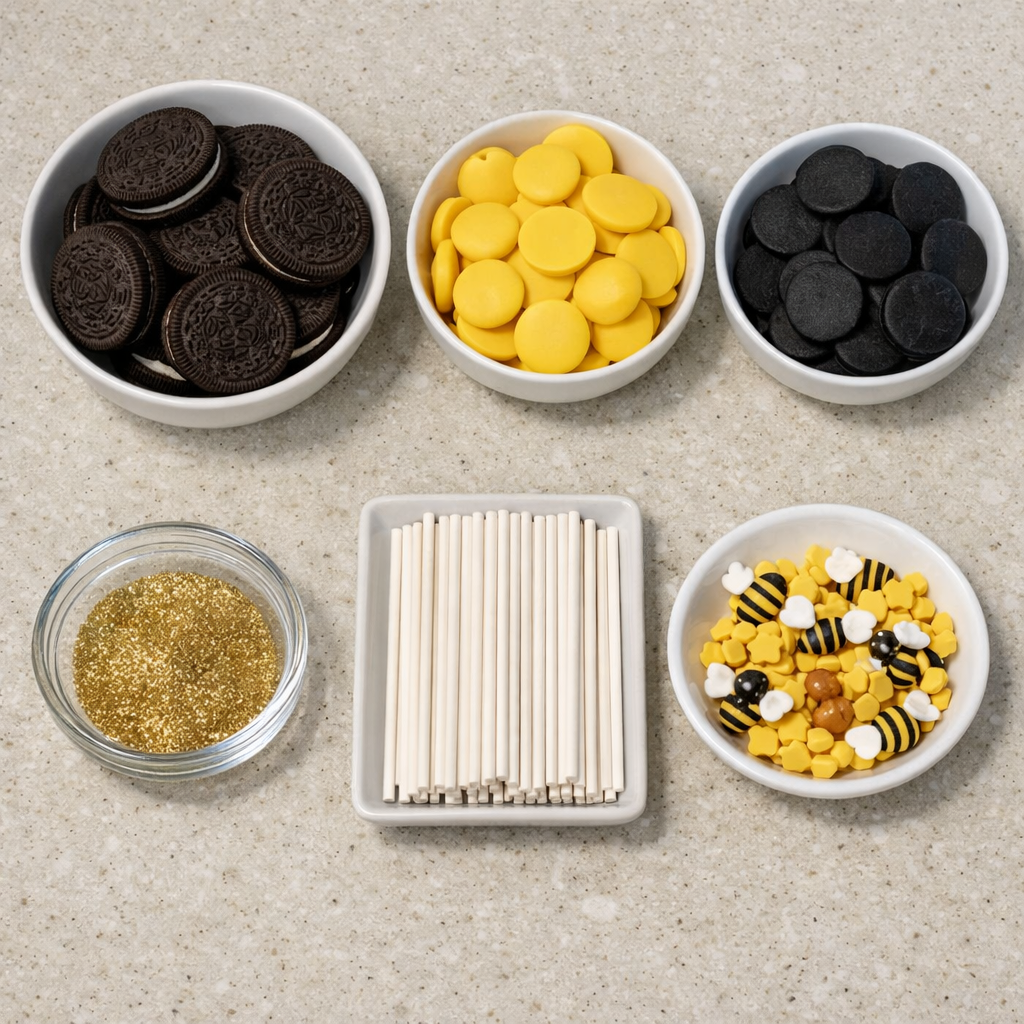
Ingredients for Honeycomb Oreo Pops
The ingredient list is short, affordable, and readily available at most grocery stores. Using high‑quality chocolate melts will give you a glossy finish and a smooth bite.
- Oreo cookies
- Yellow chocolate melts
- Black chocolate melts (optional for drizzle)
- Lollipop sticks
- Edible glitter (optional)
- Bee and honeycomb decorations (edible)
Ingredient Substitutions
If you cannot find yellow chocolate melts, you can tint white chocolate with a few drops of food‑grade yellow coloring. For a dairy‑free version, use vegan chocolate melts. The decorations can be swapped with any themed edible toppers you prefer, such as miniature fruit slices or candy beads.
How to Make Honeycomb Oreo Pops (Step‑by‑Step)
Step 1: Prepare the Chocolate
Place the yellow chocolate melts in a microwave‑safe bowl. Heat in 30‑second intervals, stirring after each burst, until fully melted and smooth. Avoid overheating to prevent scorching.
Step 2: Insert the Sticks
Take each Oreo cookie and gently press a lollipop stick into the creamy filling. Make sure the stick is centered for balance. Set the prepared cookies aside on a parchment‑lined tray.
Step 3: Dip the Cookies
Holding the stick, dip each Oreo into the melted yellow chocolate, rotating to coat all sides evenly. Allow excess chocolate to drip off before placing the pop back onto the parchment sheet.
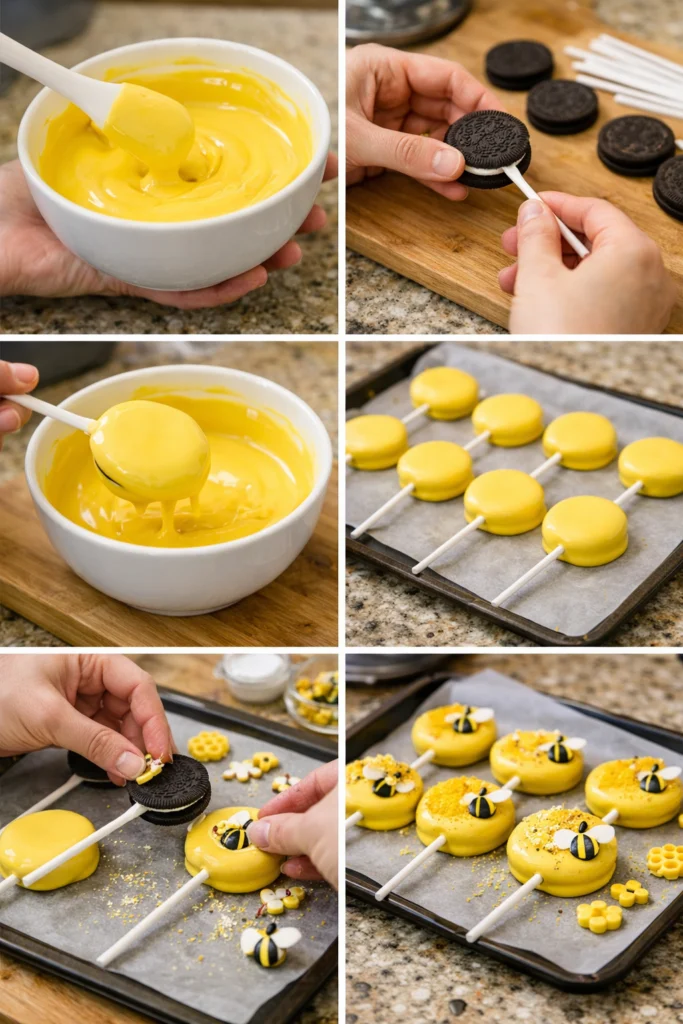
Step 4: Add Decorations
Before the chocolate sets, sprinkle a pinch of edible glitter over each pop. Gently press the bee and honeycomb decorations onto the surface, ensuring they adhere well.
Step 5: Chill Until Firm
Transfer the tray to the refrigerator for 10‑15 minutes, or until the chocolate hardens completely. This step guarantees a sturdy pop that won’t break when handled.
Step 6: Optional Drizzle
If you like contrast, melt the black chocolate melts and drizzle thin lines over the yellow coating. Let the drizzle set before serving.
Variations and Twists
Feel free to experiment with flavors and themes. Try swapping yellow chocolate for white chocolate tinted pastel pink for a spring‑time look, or use milk chocolate for a richer taste. Adding a dash of vanilla extract to the melt can deepen the flavor profile. For a spicy kick, incorporate a pinch of ground cinnamon or chili powder into the chocolate before melting. You can also replace the bee decorations with seasonal motifs—like pumpkins for fall or snowflakes for winter.
What to Serve With Honeycomb Oreo Pops
These pops pair wonderfully with light, refreshing beverages. A cold glass of grape juice or a fruity mocktail balances the sweetness. For a savory contrast, serve alongside a simple cheese platter featuring mild cheeses like mozzarella or a fresh fruit salad. If you’re hosting a full‑scale party, include a few mini cupcakes or a bowl of popcorn to give guests a variety of textures.
Pro Tips for Perfect Results
- Use a silicone spatula to scrape every last bit of chocolate from the bowl; this ensures a smooth, glossy finish.
- Work in a cool kitchen; warm ambient temperatures can cause the chocolate to set too quickly, leading to uneven coating.
- Tap the dipped Oreo gently against the side of the bowl to remove excess chocolate and prevent drips.
- For an extra sparkle, add a tiny dash of edible pearl dust alongside glitter.
- Store the finished pops on a flat surface; stacking can cause them to stick together.
Common Mistakes to Avoid
- Overheating the chocolate, which results in a grainy texture.
- Skipping the chill step; the chocolate needs time to harden fully.
- Using stale Oreo cookies; fresh cookies provide better crunch.
- Applying decorations before the chocolate is slightly set; they may sink.
- Neglecting to dry the sticks; moisture can cause chocolate to seize.
Storage, Reheating & Make‑Ahead Tips
Store the pops in an airtight container in the refrigerator for up to three days. For longer storage, place them in a single layer on a baking sheet and freeze; they will keep for up to a month. When ready to serve, let them sit at room temperature for 10 minutes to soften slightly, or microwave briefly (5 seconds) if you prefer a softer bite. Making the pops a day ahead saves time on the event day and allows the flavors to meld.
Frequently Asked Questions
Can I use milk chocolate instead of yellow? Yes, milk chocolate works well and gives a richer flavor, though the color won’t be as vibrant.
Are these safe for kids with nut allergies? As long as you use nut‑free chocolate melts, the recipe is safe.
How long does it take to make a batch? Preparation is about 20 minutes, plus 10‑15 minutes chilling, for a total of roughly 35 minutes.
Can I make them gluten‑free? Oreo cookies contain wheat, so substitute with a gluten‑free sandwich cookie for a safe version.
Do I need a candy thermometer? Not necessary; just watch for a smooth, glossy melt.
Conclusion
Honeycomb Oreo Pops are a delightful, eye‑catching treat that brings joy to any gathering. With simple steps, minimal equipment, and endless customization options, you’ll find yourself reaching for this recipe again and again. Enjoy the creative process and the smiles that follow each bite.
Print
Honeycomb Oreo Pops: Easy Fun Party Treats for Kids and Adults
- Total Time: 30 minutes
- Yield: 12 Pops
- Diet: Vegetarian
Description
Honeycomb Oreo Pops are a whimsical, easy-to-make candy that combines crunchy Oreo cookies with vibrant yellow chocolate and adorable bee‑shaped decorations. Perfect for birthdays, holidays, or a simple weekend surprise, each pop features a lollipop stick inserted into the creamy Oreo center, dipped in smooth chocolate, then finished with glitter and honeycomb accents for a sweet, eye‑catching presentation that delights kids and adults alike. Enjoy now!!
Ingredients
- Oreo cookies
- Yellow chocolate melts
- Black chocolate melts (optional)
- Lollipop sticks
- Edible glitter (optional)
- Bee and honeycomb decorations (edible)
Instructions
- Melt yellow chocolate melts in a microwave‑safe bowl, stirring until smooth.
- Insert a lollipop stick into the cream filling of each Oreo cookie.
- Dip each prepared Oreo into the melted chocolate, coating fully.
- Place coated pops on parchment‑lined sheet.
- Before chocolate sets, sprinkle edible glitter and attach bee and honeycomb decorations.
- Chill for 10‑15 minutes until hardened.
- Optional: drizzle black chocolate for contrast.
Notes
- For a dairy‑free version
- use vegan chocolate melts. Tint white chocolate with yellow food coloring if yellow melts are unavailable. Store pops in an airtight container in the refrigerator for up to three days or freeze for longer storage.
- Prep Time: 20 minutes
- Cook Time: 10 minutes
- Category: Dessert
- Method: No‑bake
- Cuisine: American
Nutrition
- Serving Size: 1 pop
- Calories: 150
- Sugar: 12g
- Sodium: 30mg
- Fat: 7g
- Saturated Fat: 4g
- Unsaturated Fat: 2g
- Trans Fat: 0g
- Carbohydrates: 18g
- Fiber: 1g
- Protein: 1g
- Cholesterol: 0mg
Keywords: Honeycomb Oreo Pops, easy candy pops, party dessert ideas, Oreo chocolate treats, how to make candy pops, fun birthday desserts, kid friendly snacks, chocolate dip recipes, quick party sweets