
Garlic Parmesan Cheeseburger Bombs changed the pace of my weeknight cooking. As Cookeroni’s chef, I juggle flavor testing with real-world family meals. I’m always chasing dishes that are fast, scalable, and crave-worthy. These bite-sized, cheesy beef bombs deliver a mouthwatering combo. The garlicky Parmesan biscuit crust makes it feel chef-level. Perfect for busy moms and professionals who want something the family will actually finish and savor. In minutes, I assemble and bake these crowd-pleasers. Then I dip them in ketchup, ranch, or burger sauce. Read on to master Garlic Parmesan Cheeseburger Bombs and wow everyone at the table.
Table of Contents
what make this Garlic Parmesan Cheeseburger Bombs special
Why this recipe fits a hectic schedule
Garlic Parmesan Cheeseburger Bombs show up when weeknights feel crowded and chaotic, easing dinner chaos everywhere. I, as Cookeroni’s chef, lean on simple pantry staples with quick, confident prep at home. Flavor blooms in the oven, delivering juicy beef and garlicky crust that everyone notices every time.
How the assembly stays simple without sacrificing flavor
The trick is minimal, pantry-friendly steps that feel smart, not rushed, yet wonderfully satisfying on busy nights. Flatten biscuits, fill with seasoned beef and cheddar, seal, and bake until golden and crisp for gatherings. A brush of garlic butter finishes the tops without extra fuss, adding a glossy finish for guests.
Why You’ll Love This Garlic Parmesan Cheeseburger Bombs
Fast, hands-off bake and bake time that fits a busy day
I love how Garlic Parmesan Cheeseburger Bombs sneak flavor into a quick weeknight. The bake does the heavy lifting—15 to 18 minutes and you’re tasting golden, puffed bombs with melty cheddar. I mix the seasoned beef while the oven preheats, fill the dough, and slide them in. No fuss, just comforting bites.
Tips that keep the process stress-free
- Prep beef filling while the oven preheats.
- Seal each bomb firmly to prevent leaks.
- Line the sheet with parchment for easy cleanup.
Ingredients
What you’ll need to assemble the bombs
Ingredient list (summary)
I keep things simple and flavorful.
Exact quantities appear at the bottom of this article for printing.
I grab fresh ingredients to ensure melt and flavor shine.
- 1 lb ground beef
- 1 tbsp olive oil
- 1 tsp garlic powder
- 1 tsp onion powder
- 1/2 tsp paprika
- Salt and pepper, to taste
- 1 cup shredded cheddar cheese
- 1 can (16 oz) refrigerated biscuit dough
- 3 tbsp melted butter
- 2 garlic cloves, minced
- 2 tbsp grated Parmesan cheese
- Fresh parsley, chopped (for garnish)
Substitutions and notes (cheddar alternatives, optional add-ins)
Cheese swaps keep things interesting.
Pepper jack or mozzarella melt beautifully for variety.
I often mix cheeses for extra ooze and sparkle.
- Cheddar alternatives: Pepper jack, mozzarella, or a blend
- Optional add-ins: cooked bacon bits, finely minced jalapeño, chopped sun-dried tomatoes
- Sourcing tips: buy a block of cheddar and shred yourself for best melt. Pre-shredded can be dry
- Dairy-friendly option: use dairy-free butter and plant-based cheese if needed
How to Make Garlic Parmesan Cheeseburger Bombs
Step 1: Prep
Keep seasoning balanced; tips for handling the beef mixture
I start by browning 1 pound of ground beef with olive oil. I sprinkle garlic powder, onion powder, paprika, and a generous pinch of salt and pepper as it sizzles. I crumble the meat with a spatula until it looks like tiny granite crumbs.
Let the beef cook until it’s browned and crumbly, then drain any excess fat. I let the mixture cool a bit so it won’t melt the cheese or sog the biscuit dough later. This short pause makes a big difference in texture.
I mix in about 1 cup of shredded cheddar so the filling stays juicy but not runny. If I’m feeling extra playful, I reserve a little cheese to sprinkle after baking for an oozy finish. The goal is a balanced bite—savory beef, cheesy hint, and a garlicky kick.
- Keep seasoning balanced by tasting off heat.
- Cool the filling so it won’t melt the dough.
- Reserve a small cheese portion for bursts of melt after baking.
Step 2: Cook
Drain excess fat; timing cues to avoid drying
Step 2 begins with medium heat and a hot skillet. I break the beef into tiny bits as it browns, aiming for a crumbly texture rather than chunky clumps. I watch for a nice, even sear that seals in juices.
When the beef is fully browned, I drain the fat completely and let it rest for a minute. Resting keeps juices in check and helps prevent greasiness inside the biscuit bombs. If any moisture pools, I dab it away with a napkin.
Taste a small pinch of the cooled filling and adjust salt if needed. If you crave more garlic, add a touch more garlic powder—but go easy. Set the filling aside to cool fully before wrapping.
- Drain fat thoroughly for crisp bombs.
- Let filling cool completely before assembly.
- Taste and adjust seasoning off heat.
Step 3: Fill and Seal
How to seal dough securely to prevent leaks
Flatten each refrigerated biscuit dough round to create a roomy pocket. I press the dough into a round, thin disk so the filling has space to nestle without bursting. Place about 1 tablespoon of the cooled beef filling and a pinch of cheddar in the center.
Fold the dough up and over the filling, then pinch the seams shut as firmly as you can. I rotate the bomb as I seal so every side is snug. Place seam-side down on the parchment-lined tray for easy handling and even baking.
If you see any gaps, patch them with a tiny pinch of dough and press closed. The goal is a tight package that won’t leak while baking. Repeat with the remaining bombs until you’ve used all the dough and filling.
- Seal seams securely to prevent leaks.
- Keep bombs seam-side down for stability.
- Use parchment for quick cleanup.
Step 4: Bake and Brush
Garlic butter finish for golden, crispy tops
Preheat the oven to 375°F (190°C) and line a sheet pan with parchment. I place the sealed bombs seam-side down so they puff around the filling as they bake. This positioning also helps the tops stay smooth and golden.
In a small bowl, whisk melted butter with minced garlic. I brush this garlicky butter over each bomb, then sprinkle grated Parmesan for a glossy, cheesy crust. The scent alone is enough to trigger hungry smiles.
Bake for 15 to 18 minutes, or until the biscuits are golden and puffed. If your oven runs hot, rotate the pan halfway through for even browning. Let the bombs rest a few minutes to set before serving.
- Brush with garlic butter while hot for best adhesion and shine.
- Rotate the pan for even browning.
- Don’t overbake to keep the filling juicy.
Step 5: Garnish and Serve with Dipping Sauces
Serving temperature and presentation tips
When Garlic Parmesan Cheeseburger Bombs come out, give them a minute to rest so the cheese settles and the dough firms up a touch. This makes them easier to dip and bite into without squishing the center.
Garnish with chopped fresh parsley for color, then serve warm. I love pairing these with ketchup, ranch, or a favorite burger sauce for dipping. They’re perfect as a game-day snack or a weeknight crowd-pleaser that disappears fast.
- Serve warm for best texture and melt.
- Pair with your go-to dipping sauces.
- Great for sharing with family and friends.

Tips for Success
Quick tips to keep the bombs juicy and flavorful
- Brown Garlic Parmesan Cheeseburger Bombs beef until crumbly; drain fat well.
- Cool filling completely before wrapping to prevent soggy dough.
- Seal seams tightly to prevent leaks during baking.
- Reserve a little cheese to melt after baking for extra ooze.
- Brush garlic butter on hot bombs for shine and moisture.
- Line the pan with parchment for easy cleanup.
Make-ahead and texture tips
- I assemble bombs and refrigerate up to 2 hours before baking.
- I freeze unbaked bombs on a sheet, then bag for storage.
- I bake from frozen; add 5–7 minutes to bake time.
- If dough cracks, patch with tiny dough bits and seal.
Equipment Needed
I keep these tools simple and reliable for Garlic Parmesan Cheeseburger Bombs in a busy kitchen.
Must-have tools for Garlic Parmesan Cheeseburger Bombs
- 12-inch skillet for browning beef.
- Quarter-sheet pan with parchment.
- Large mixing bowls for filling.
- Rolling pin to flatten biscuit rounds.
- Pastry brush for garlic butter.
Optional upgrades to speed things up
- Mini chopper or knife for garlic.
- Kitchen scale for precise portions.
Variations
Cheesy and spicy twists
- I love a hotter twist by swapping in pepper jack or mozzarella for extra melt.
- I add minced jalapeño or a pinch of red pepper flakes for a kick.
- I sometimes stir in crumbled bacon or chopped sun-dried tomatoes for smoky pockets of flavor.
Dairy-free or lighter options
- I use dairy-free butter and cheese, or switch to a leaner beef blend.
- For a lighter crust, I try gluten-free biscuit dough or bake a minute or two less.
- If needed, I skip extra cheese to reduce calories while keeping flavor.
Different cheese or dough tweaks
- I like cheddar-mozzarella blend or Gruyère for depth.
- I swap in crescent dough or puff pastry for a flakier bite, sealing well.
- I keep the filling balanced by not overstuffing the bombs.
Serving Suggestions
Serving Garlic Parmesan Cheeseburger Bombs is all about easy, crave-worthy pairings.
- Crunchy sides: kettle chips or a quick green salad.
- Drinks: iced tea with lemon or sparkling water for kids; a light wine for adults.
- Presentation: serve warm on a platter with small bowls of sauce and a parsley sprig.
Sauces and dipping ideas
- Ketchup, ranch, garlic mayo, burger sauce, or smoky BBQ sauce.
Make-Ahead & Freezer-Friendly Garlic Parmesan Cheeseburger Bombs
Assemble now, bake later
Freezing guidance and bake-time adjustments
On busy nights, I love to assemble the bombs ahead. I wrap and refrigerate them for up to 2 hours before popping them in the oven. The dough stays tender and the filling stays juicy, so dinner stays stress-free.
For longer storage, freeze the assembled bombs on a parchment-lined sheet until solid, then transfer to an airtight bag. Label with date and use within 1 month.
When baking from frozen, keep the oven at 375°F and add 5–7 minutes to the bake time. If you thaw the bombs overnight, bake 15–18 minutes as normal. Let them rest a few minutes before serving.
FAQs
Can Garlic Parmesan Cheeseburger Bombs be air-fried?
Yes. I love air-frying Garlic Parmesan Cheeseburger Bombs for extra crispness. Garlic Parmesan Cheeseburger Bombs stay juicy inside and crispy outside when air fried. Preheat to 375–400°F and place bombs in a single layer with space between. Cook 8–10 minutes, flipping once, until golden and heated through. Brush with garlic butter after they come out for shine. If your oven runs hot, check one early to avoid underdone centers.
How should I store leftovers?
Leftovers keep best in the fridge in an airtight container. They stay good for 2–3 days. Reheat in the oven or air fryer for best texture. Microwave can dry them out, so I avoid it. Serve warm with your favorite dipping sauces for a quick lunch or snack.
Can I freeze the bombs after baking?
Yes. You can freeze Garlic Parmesan Cheeseburger Bombs after baking. Freeze on a parchment-lined tray until solid, then seal in a bag. Label with date for best quality. Reheat from frozen at 375°F for 12–15 minutes. If you thaw overnight, bake 10–12 minutes. Let them rest a minute before serving.
Can I customize the filling or dough?
Absolutely. You can customize the filling or dough. Try pepper jack or mozzarella for extra melt; I like a little jalapeño. For dough, use crescent rolls, puff pastry, or gluten-free options. Seal well and adjust bake time when swapping dough. Garlic Parmesan Cheeseburger Bombs stay delicious with any swap.
Final Thoughts
These Garlic Parmesan Cheeseburger Bombs pack flavor and speed that busy homes crave. I love how they bake quickly, stay juicy, and travel well to gatherings. A warm platter, a few dips, and smiles all around—weeknights suddenly feel doable. I hope you try them soon and feel the same spark in your kitchen.
If you’re short on time, I suggest lining up fillings ahead. These little bombs freeze beautifully, making weeknight dinners a breeze. And when guests arrive, you pop them in the oven and serve. Cooking, for me, is love you can taste.
Print
Garlic Parmesan Cheeseburger Bombs: 3 Epic Delish Fast.
- Total Time: 40 minutes
- Yield: 16 cheeseburger bombs 1x
- Diet: Low Fat
Description
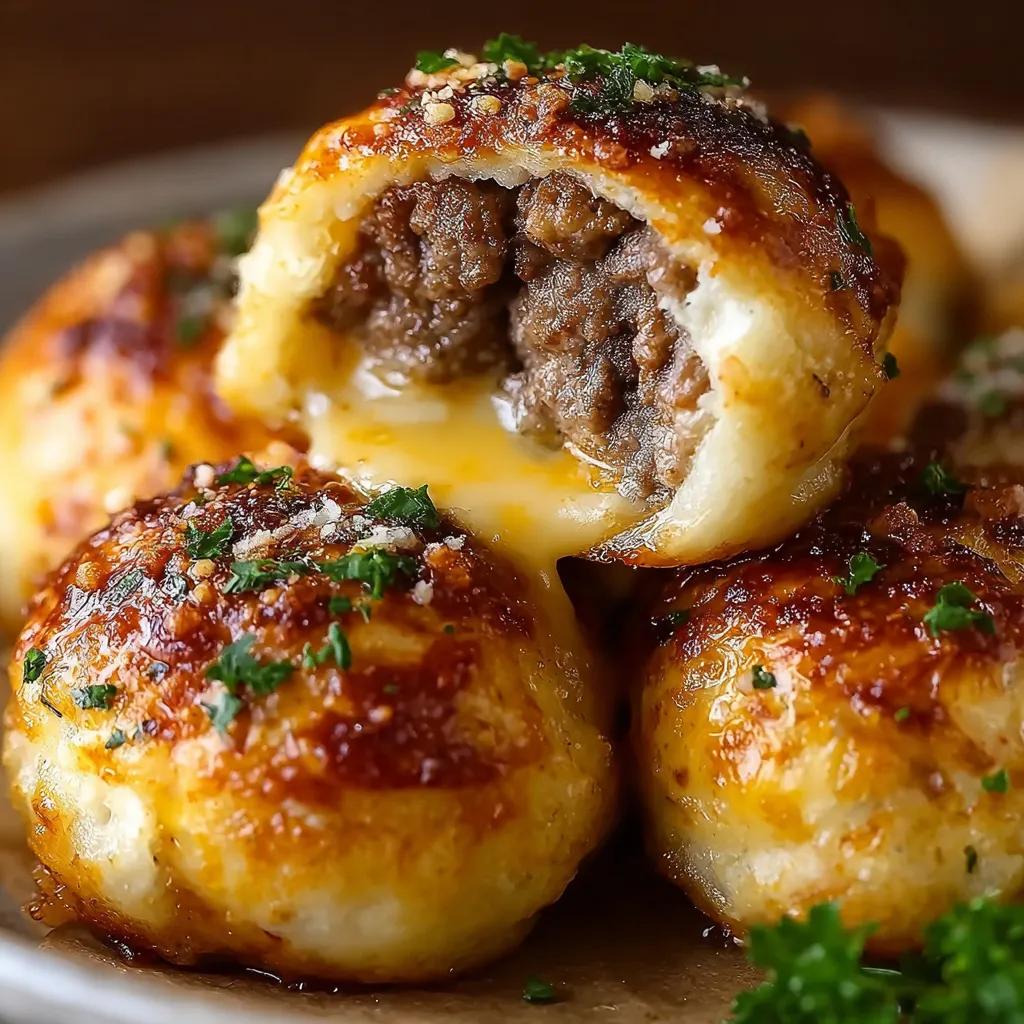
Garlic Parmesan Cheeseburger Bombs are juicy, cheesy, bite-sized delights that combine seasoned ground beef, cheddar, and a garlicky Parmesan biscuit crust for a ultimate game-day snack.
Ingredients
- 1 lb ground beef
- 1 tbsp olive oil
- 1 tsp garlic powder
- 1 tsp onion powder
- ½ tsp paprika
- Salt and pepper, to taste
- 1 cup shredded cheddar cheese
- 1 can (16 oz) refrigerated biscuit dough
- 3 tbsp melted butter
- 2 garlic cloves, minced
- 2 tbsp grated Parmesan cheese
- Fresh parsley, chopped (for garnish)
Instructions
- Preheat oven to 375°F (190°C) and line a baking sheet with parchment paper.
- Heat olive oil in a skillet over medium heat. Add ground beef, garlic powder, onion powder, paprika, salt, and pepper. Cook until browned and crumbly. Drain excess fat and let cool slightly.
- Flatten each biscuit and place 1 tbsp of the beef mixture and a pinch of cheddar cheese in the center. Fold the dough around the filling and pinch to seal.
- Place seam-side down on the prepared baking sheet.
- Mix melted butter with minced garlic and brush over each bomb. Sprinkle with Parmesan cheese.
- Bake for 15–18 minutes or until golden brown and puffed.
- Garnish with parsley and serve warm with ketchup, ranch, or burger sauce for dipping.
Notes
- Make ahead: Assemble the bombs and refrigerate for up to 2 hours before baking.
- To freeze: Freeze assembled bombs; bake from frozen, adding 5–7 minutes to the bake time.
- Variations: Try pepper jack or mozzarella in place of cheddar for different melt and spice levels.
- Dipping sauces: Serve with ketchup, ranch, or your favorite burger sauce.
- Prep Time: 15 minutes
- Cook Time: 25 minutes
- Category: Appetizers
- Method: Bake
- Cuisine: American
Nutrition
- Serving Size: 1 bomb
- Calories: 170
- Sugar: 1
- Sodium: 210
- Fat: 9
- Saturated Fat: 4
- Unsaturated Fat: 5
- Trans Fat: 0
- Carbohydrates: 16
- Fiber: 1
- Protein: 9
- Cholesterol: 35
Keywords: garlic parmesan cheeseburger bombs, garlic parmesan cheeseburger bombs recipe, game day snack, cheesy beef bites, stuffed biscuit bombs