
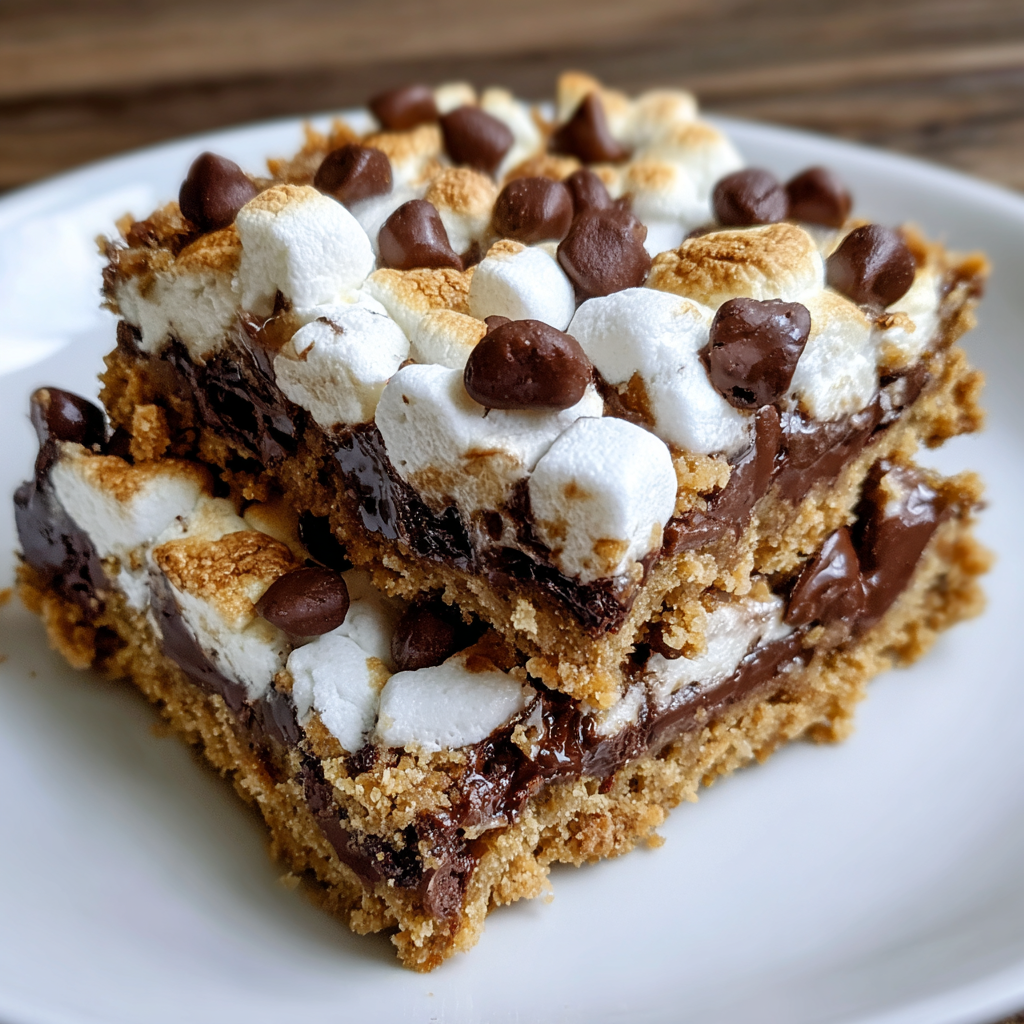
S’mores Dessert Bars are the ultimate handheld version of the classic campfire favorite, combining a buttery graham cracker base, rich chocolate chips, and fluffy toasted marshmallows into a convenient, bake‑ready bar that anyone can enjoy at a party, family gathering, or even a quick after‑school snack. I love how the simple ingredients come together in just minutes, delivering that nostalgic sweet‑and‑gooey flavor without any mess, and the recipe scales easily for a crowd while staying perfectly portable for picnics or road trips. The caramelized edges add crunch and a chocolate ribbon yum.
Table of Contents
Why You’ll Love This S’mores Dessert Bars
There is something inherently comforting about the combination of graham cracker, chocolate, and marshmallow. This dessert bar captures that comfort in a format that is easy to serve, store, and transport. Unlike traditional s’mores that require a fire and careful assembly, these bars bake in a standard oven, giving you consistent results every time.
Because the bars are baked, the marshmallows develop a golden‑brown exterior while staying soft inside, creating a delightful texture contrast. The chocolate chips melt into a glossy layer that binds the crumb base and marshmallow topping together, ensuring each bite is uniformly gooey and sweet. Whether you are feeding a crowd at a backyard barbecue or looking for a quick after‑dinner treat, these bars fit the bill.
Equipment You’ll Need
Preparing these bars does not require a lot of specialized tools. A basic set of kitchen equipment will do the trick, making the recipe accessible for even novice bakers.
- 8×8‑inch baking dish or pan
- Mixing bowls (one for crust, one for topping)
- Rubber spatula or spoon for mixing
- Measuring cups and spoons
- Oven mitts
Ingredients for S’mores Dessert Bars
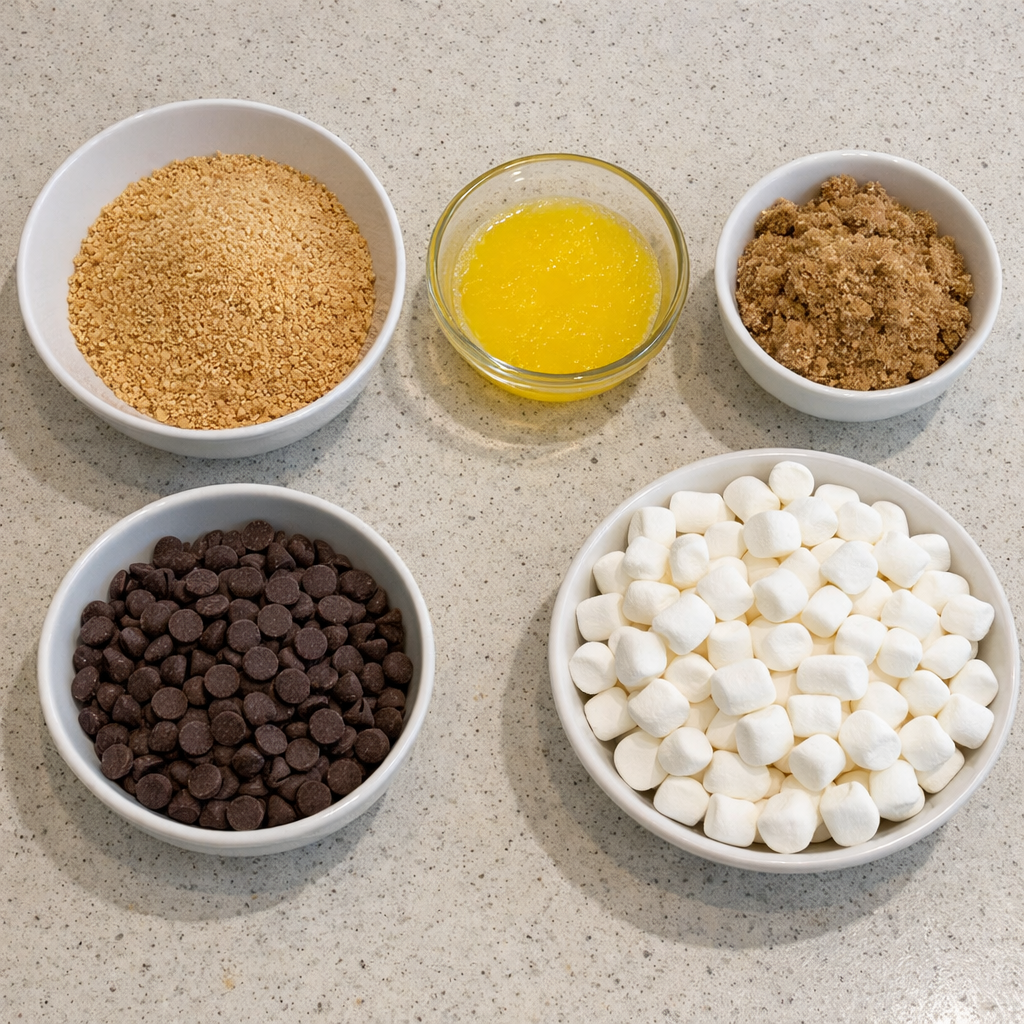
The ingredient list is short, affordable, and likely already stocked in most pantries. Here is what you will need:
- 1 cup graham cracker crumbs
- 1/2 cup melted butter
- 1 cup chocolate chips
- 2 cups mini marshmallows
- 1/2 cup brown sugar
- 1/2 teaspoon vanilla extract
- 1/4 teaspoon salt
Ingredient Substitutions
If you need to adapt the recipe, you can substitute the graham cracker crumbs with crushed digestive biscuits for a slightly different flavor profile. For a dairy‑free version, use a plant‑based butter alternative; the texture will remain similar. Dark chocolate chips can replace milk chocolate chips for a richer taste, and the brown sugar can be swapped with coconut sugar if you prefer a lower‑glycemic option.
How to Make S’mores Dessert Bars (Step‑By‑Step)
Step 1: Preheat the Oven
Set your oven to 350°F (175°C) and allow it to fully preheat before you begin assembling the bars. This ensures even baking and a consistent crust texture.
Step 2: Prepare the Baking Dish
Lightly grease the bottom and sides of an 8×8‑inch baking dish with a thin layer of melted butter or a neutral oil. This prevents the crust from sticking and makes removal easier.
Step 3: Mix Crust Ingredients
In a medium bowl, combine the graham cracker crumbs with the melted butter. Stir until the crumbs are evenly coated and the mixture holds together when pressed.
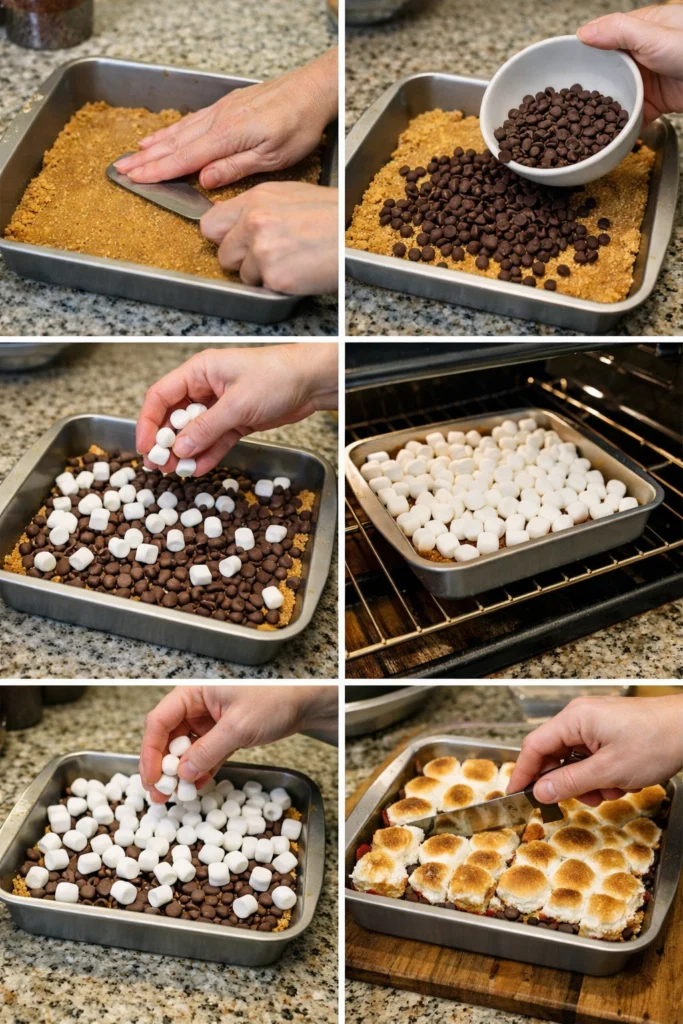
Step 4: Form the Crust
Transfer the crumb mixture into the prepared baking dish. Using the back of a spoon or your hands, press the mixture firmly into an even layer covering the entire bottom of the pan.
Step 5: Add Chocolate Layer
Scatter the chocolate chips evenly over the pressed crust. The chips will melt during baking, creating a glossy chocolate base for the marshmallow topping.
Step 6: Prepare Marshmallow Topping
In a separate bowl, whisk together the mini marshmallows, brown sugar, vanilla extract, and salt until the mixture is well combined and slightly sticky.
Step 7: Spread Topping Over Chocolate
Evenly spread the marshmallow mixture over the chocolate chips, making sure to cover the entire surface. Small gaps are fine; they will close as the marshmallows expand.
Step 8: Bake the Bars
Place the pan in the preheated oven and bake for 15‑20 minutes, or until the marshmallows turn a golden‑brown hue and the chocolate is fully melted. Keep an eye on the edges to avoid over‑browning.
Step 9: Cool and Slice
Remove the pan from the oven and let it cool on a wire rack for at least 10 minutes. This allows the bars to set, making them easier to cut. Use a sharp knife, wiping it clean between cuts, to slice the dessert into twelve equal squares.
Variations and Twists
While the classic version is already a hit, you can experiment with several flavor twists to keep things interesting. Add a pinch of cinnamon or a dash of espresso powder to the crust for a warm spice note. For a nutty crunch, fold chopped toasted pecans or walnuts into the graham cracker mixture before pressing the crust. If you enjoy a salty‑sweet contrast, sprinkle a few flakes of sea salt over the marshmallow layer just before baking. For a fruity spin, incorporate dried cranberries or chopped apricots into the topping mixture.
What to Serve With S’mores Dessert Bars
These bars pair beautifully with a range of complementary foods and beverages. Serve them alongside fresh fruit such as sliced strawberries or banana for a lighter contrast. A scoop of vanilla ice cream or a dollop of whipped cream adds creaminess that balances the gooey texture. For drinks, consider a chilled glass of grape juice, a classic milkshake, or a warm mug of hot cocoa—any of these will enhance the nostalgic campfire vibe.
Pro Tips for Perfect Results
- Use real butter for the crust; it provides the richest flavor and firm texture.
- Do not over‑mix the marshmallow topping; gentle folding keeps the air incorporated, which contributes to a fluffy finish.
- Watch the bars closely during the last minutes of baking; marshmallows can go from golden to burnt quickly.
- Allow the bars to rest after baking; this step is crucial for clean slicing.
- Store leftovers in an airtight container at room temperature for up to three days; they stay soft and moist.
Common Mistakes to Avoid
- Skipping the greasing step can cause the crust to stick, making removal messy.
- Using a crust that is too dry will result in a crumbly base that breaks apart when cut.
- Over‑baking the marshmallows leads to a hard, caramelized top rather than a soft, gooey texture.
- Leaving the bars to cool for too short a time makes them fall apart during slicing.
Storage, Reheating & Make‑Ahead Tips
These bars store well at room temperature in a sealed container; they remain soft for up to three days. For longer storage, wrap individual bars in plastic wrap and freeze them for up to two months. To reheat, place a frozen bar on a microwave‑safe plate and heat for 15‑20 seconds, or warm the entire pan in a 300°F oven for about 10 minutes, which restores the melty marshmallow texture.
Frequently Asked Questions
Can I make these bars without an oven? Yes, you can use a toaster oven or a stovetop pan with a lid, but you’ll need to monitor the heat closely to avoid burning the marshmallows.
What type of chocolate works best? Semi‑sweet or milk chocolate chips melt evenly and provide a balanced sweetness. Dark chocolate gives a richer flavor for grown‑up palates.
Are these bars gluten‑free? Replace the graham cracker crumbs with certified gluten‑free oat or rice crackers to make the recipe safe for gluten‑intolerant guests.
Conclusion
With minimal effort and a handful of pantry staples, you can create S’mores Dessert Bars that capture the magic of a campfire treat in a convenient, sliceable form. Whether you serve them at a family gathering, a school event, or simply enjoy them as a personal indulgence, these bars are sure to become a favorite go‑to dessert.
Print
Easy S’mores Dessert Bars Recipe – Chewy Chocolate Marshmallow Treat
- Total Time: 35 minutes
- Yield: 12 bars 1x
- Diet: Vegetarian
Description
These S’mores Dessert Bars deliver the classic campfire flavor in a portable, bake‑ready slice. A buttery graham cracker crust forms the perfect base for melted chocolate chips and a fluffy marshmallow topping, creating a sweet, gooey, and crunchy treat. Ready in just 35 minutes, this easy recipe yields twelve indulgent bars that are ideal for parties, after‑school snacks, or a quick dessert fix. No fancy equipment needed—just a pan, oven, and simple pantry staples for a crowd‑pleasing result.
Ingredients
- 1 cup graham cracker crumbs
- 1/2 cup melted butter
- 1 cup chocolate chips
- 2 cups mini marshmallows
- 1/2 cup brown sugar
- 1/2 teaspoon vanilla extract
- 1/4 teaspoon salt
Instructions
- Preheat oven to 350°F (175°C) and grease an 8×8 inch baking dish.
- Combine graham cracker crumbs and melted butter; press into the dish to form a crust.
- Sprinkle chocolate chips evenly over the crust.
- Mix mini marshmallows, brown sugar, vanilla extract, and salt; spread over chocolate.
- Bake 15-20 minutes until marshmallows are golden and bubbly.
- Cool, then cut into squares and serve.
Notes
- For a softer crust
- add a tablespoon of melted butter. Store in an airtight container at room temperature for up to three days. Freeze individually wrapped bars for longer storage.
- Prep Time: 15 minutes
- Cook Time: 20 minutes
- Category: Desserts
- Method: Baking
- Cuisine: American
Nutrition
- Serving Size: 1 bar
- Calories: 210
- Sugar: 20g
- Sodium: 150mg
- Fat: 9g
- Saturated Fat: 5g
- Unsaturated Fat: 3g
- Trans Fat: 0g
- Carbohydrates: 30g
- Fiber: 1g
- Protein: 2g
- Cholesterol: 0mg
Keywords: S’mores Dessert Bars, easy s’mores recipe, s’mores bars, campfire desserts, chocolate marshmallow bars, no-bake s’mores, quick dessert bars, party sweets, chocolate graham cracker treat