
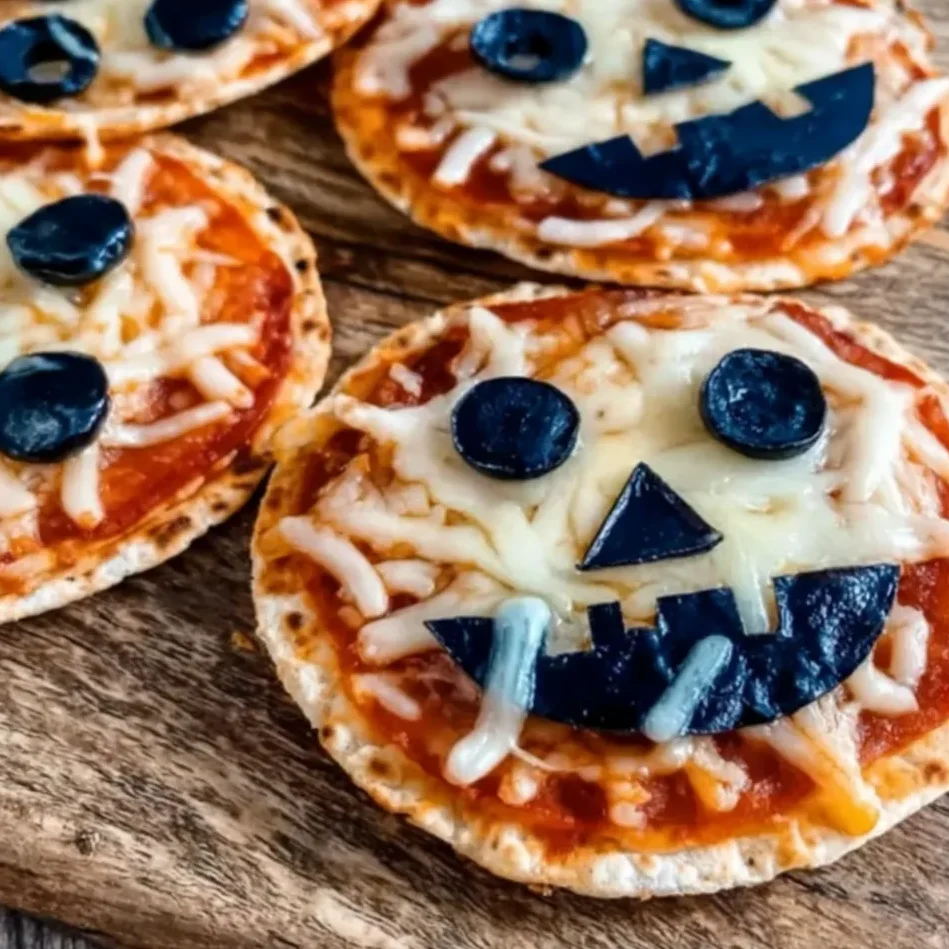
Easy Mini Halloween Pizzas is a festive, cheesy mini bite that fits a busy schedule. As a chef who designs weeknight meals for busy families and professionals, I know time matters. I wanted a snackable, shareable Halloween treat that needs no days in the kitchen. In about 23 minutes, you have six mini pizzas ready, with shapes from cheese and olives. Read on for tips to speed prep, plus make-ahead options and variations. I’ll share practical steps and simple hacks.
Table of Contents
what make this Easy Mini Halloween Pizzas special
I reach for Easy Mini Halloween Pizzas on busy weeknights. They turn simple ingredients into playful, shareable treats. The mini format keeps portions in check and the designs spark cheers at the table.
This approach fits my life as a home cook who designs weeknight meals for busy families and professionals. I love how fast they come together, and I see the same excitement in kids and adults when pumpkins, spiders, and ghosts appear on a single tray. And yes, cleanup is kinder to my sanity than a full pizza night.
The concept isn’t just cute; it’s practical. You can swap shapes for favorites, and the ingredients stay pantry-friendly and affordable.
Why this approach works for busy families
Time-efficient and crowd-friendly
In my kitchen, this method feels like a fast-forward button. Six mini pizzas bake at once, feeding a hungry crowd with minimal fuss.
- Six mini pizzas bake on a single sheet, making crowd-friendly snacks.
- Short prep time keeps weeknights moving and reduces kitchen fatigue.
- Design options let picky eaters pick their favorite shapes.
- Use tortillas or flatbreads for extra speed—no dough rising or rolling.
- Leftovers reheat quickly in a warm oven, not a soggy microwave.
Why You’ll Love This Easy Mini Halloween Pizzas
I reach for Easy Mini Halloween Pizzas when time is tight and I want something playful that still feels like a treat.
They taste great and look festive, and they vanish fast on a busy weeknight.
It’s a light, tasty win for my family and me.
Benefits at a glance
Quick, customizable, and kid-friendly
Ingredients Easy Mini Halloween Pizzas
Here are the ingredients for six Easy Mini Halloween Pizzas. Measurements are precise for consistent bites. I keep the list simple so you can shop quickly.
- 6 small flour tortillas (gluten-free option: use gluten-free tortillas)
- 1 cup pizza sauce
- 2 cups shredded mozzarella cheese (or dairy-free mozzarella, if needed)
- Sliced cheddar or provolone cheese for shapes
- Black olives, sliced
- Optional: bell peppers, mushrooms, or pepperoni, cut into fun shapes
Exact quantities are listed at the bottom of this post and are printable.
How to Make Easy Mini Halloween Pizzas
Making Easy Mini Halloween Pizzas is my fast fix for busy weeknights.
I love how they blend pizza favorites with festive fun.
Six little bites light up the table and save my sanity.
Step 1: Preheat and prep
I start by preheating the oven to 375°F (190°C), readying the kitchen.
I line a sheet with parchment for easy cleanup and quick cleanup passes.
I set out tortillas, sauce, cheese, and toppings within reach on the counter.
Step 2: Build the bases
Spread a thin layer of sauce on each tortilla, aiming a light coat.
Top with mozzarella, about 1/4 cup per mini pizza, evenly distributed.
Keep toppings light to avoid soggy crust.
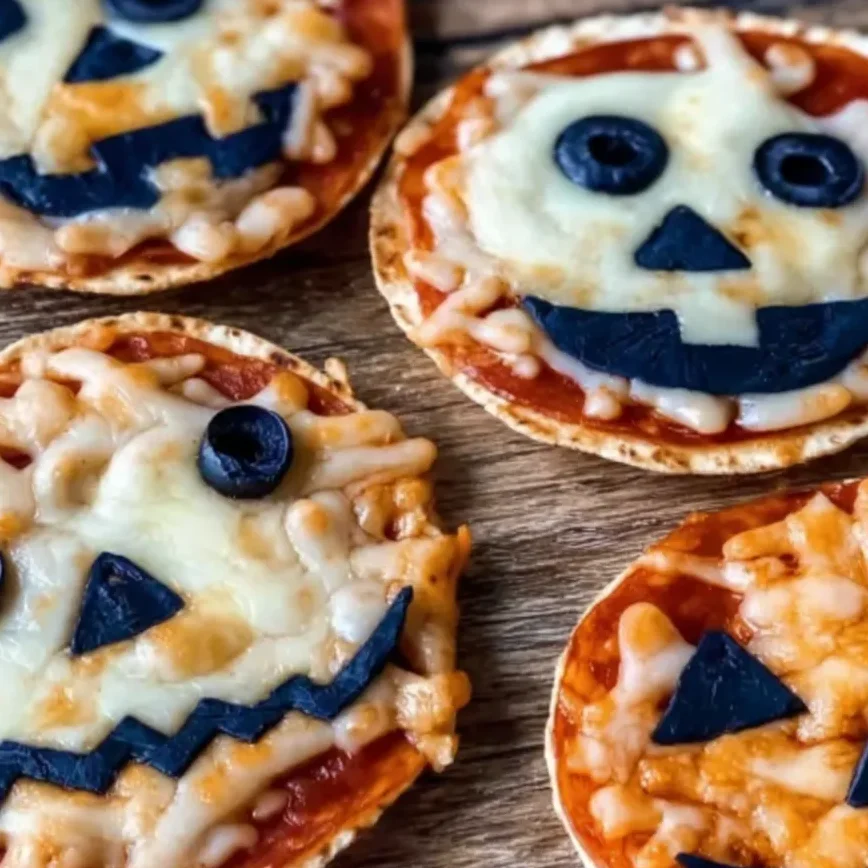
Step 3: Create spooky designs
Cut shapes from cheddar or provolone for pumpkins, ghosts, or bats that look playful.
Press olives for eyes or mouths to finish the characters with personality.
Arrange shapes to tell a tiny Halloween story on each face.
Step 4: Bake to bubbly perfection
Bake on the middle rack for eight to ten minutes.
Watch for bubbling cheese and crisped edges.
If you like crisper bottoms, bake a little longer.
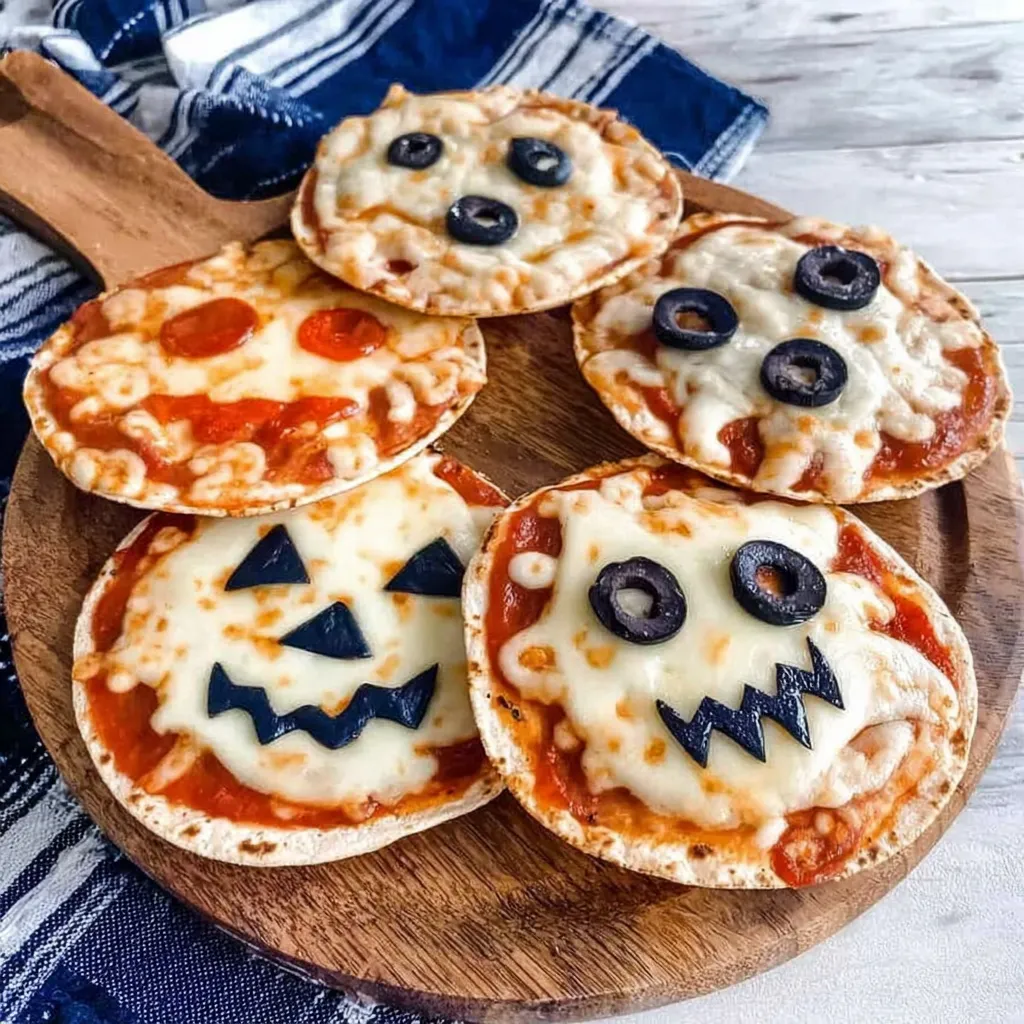
Step 5: Serve and enjoy
Let the pizzas rest a minute, then serve warm, so cheese sets nicely.
Arrange on a platter with extra olives for eyes and smiles.
Enjoy these Easy Mini Halloween Pizzas with giggles and compliments from friends.
Tips for Success
- I set up quick mise en place so Easy Mini Halloween Pizzas come together fast.
- I keep toppings light and evenly distributed to avoid soggy crusts.
- I preheat to 375°F and line my sheet with parchment.
- I cut cheese shapes ahead of time; hearts, pumpkins, and ghosts save minutes.
- I bake on a single sheet and watch edges turn lightly golden.
- I store leftovers in the fridge and reheat briefly.
Equipment Needed
Essential tools to keep on standby.
- Baking sheet with parchment paper or a silicone mat
- Small spoon or pastry brush for sauce
- Sharp knife or kitchen scissors for cheese shapes
- Cookie cutters or small stencils for pumpkins and bats
- Tongs or a spatula to transfer hot pizzas
Variations
These variations keep Easy Mini Halloween Pizzas flexible for different diets and crowds. I love tailoring them to what’s in my pantry, my kids’ favorites, and Halloween gatherings.
- Gluten-free version: Use gluten-free tortillas and ensure the sauce is gluten-free.
- Dairy-free option: Swap in dairy-free mozzarella for melting magic.
- Extra-crisp crust: Pre-bake tortillas for 2 minutes before topping.
- Meat additions: Include pepperoni or sausage shapes for meat lovers.
- Flavor boosters: Add a pinch of Italian seasoning to the sauce.
- Creative shapes: Use colorful peppers or mushrooms to craft playful characters.
Serving Suggestions
- Serve Easy Mini Halloween Pizzas on a bright platter with extra olives for eyes.
- Pair them with a simple greens salad and a spooky cider.
- Display on a dark board with a mini Halloween backdrop to wow guests.
- Keep the tray warm in a low oven so cheese stays bubbly.
Make-Ahead Easy Mini Halloween Pizzas: Party-Plan Shortcuts
Easy Mini Halloween Pizzas are a lifesaver for busy weeknights. I love having a tray ready to bake while guests arrive and the kids’ costumes glow in the hallway. This make-ahead strategy keeps the party relaxed and the cheese melted into smiles.
To make-ahead, partially bake the tortillas for 2 minutes to set the crust. Cool, then stack in an airtight container with parchment between layers. Store in the fridge up to 24 hours, ready for toppings and final bake.
Keep sauce, cheese, and toppings in separate containers. Assemble toppings just before baking to avoid soggy crust. Or pre-assemble, then refrigerate the unbaked tray; bake when you’re ready.
Want hot, bubbly bites on demand? Reheat assembled pizzas at 375°F for 8–10 minutes, until cheese is melted and edges crisp. Line the sheet with parchment to protect bottoms and rotate the tray for even browning.
FAQs
Here are FAQs for Easy Mini Halloween Pizzas, answered from my kitchen desk and experience with busy weeknights.
Can I make these with gluten-free tortillas?
Yes. Use gluten-free tortillas and double-check that every ingredient, especially the pizza sauce, is gluten-free. The bake time stays the same, but gluten-free shells can brown a bit faster, so keep an eye on the edges. Use clean utensils to avoid cross-contamination.
Can I freeze baked mini pizzas?
Yes. You can freeze baked mini pizzas once they’ve cooled. Freeze on a sheet until solid, then stack in freezer bags. Reheat in a 375°F oven until hot and bubbly, about 8–10 minutes, or bake from frozen for a few minutes longer. For best texture, reheat within 1–2 months.
Are these vegetarian-friendly as written?
Absolutely. The recipe relies on cheese, sauce, and vegetables, with no meat in the base version. If you want dairy-free, swap plant-based cheese and use a dairy-free sauce. You can also add veggie toppings to boost flavors while keeping them vegetarian-friendly.
How should leftovers be stored and reheated?
Store leftovers in the fridge in an airtight container for up to 2–3 days. Reheat in a preheated 350–375°F oven until hot and the cheese is melted, about 8–10 minutes. For a crisper crust, finish under a hot broiler for 1–2 minutes, watching closely.
Final Thoughts
These Easy Mini Halloween Pizzas feel like edible cheer on a busy weeknight, I truly love that.
A simple tortilla becomes a party tray, and the kitchen sighs with relief after a day.
Six mini pizzas on one sheet cut chaos, spark smiles, and fuel Halloween chatter around our table.
As a home cook, I crave meals that fit busy days—school runs, meetings, and endless dish pile.
These bites offer a quick, shareable centerpiece that still feels special enough to make someone smile.
Pop them on a bright platter, cue playful music, and watch the room light up tonight, together.

Easy Mini Halloween Pizzas Craft 6 Spooky Cheesy Bites.
- Total Time: 23 minutes
- Yield: 6 mini pizzas 1x
- Diet: Vegetarian
Description
Easy Mini Halloween Pizzas are festive, cheesy bites that are quick to make and perfect for spooky gatherings.
Ingredients
- 6 small flour tortillas
- 1 cup pizza sauce
- 2 cups shredded mozzarella cheese
- Sliced cheddar or provolone cheese for shapes
- Black olives, sliced for eyes, spiders, or faces
- Optional: bell peppers, mushrooms, or pepperoni cut into fun shapes
Instructions
- Preheat oven to 375°F (190°C). Line a baking sheet with parchment paper.
- Place tortillas on the baking sheet and spread each with pizza sauce.
- Sprinkle shredded mozzarella evenly on top.
- Use sliced cheeses, olives, and veggies to create spooky designs (pumpkins, mummies, spider webs, or ghost faces).
- Bake 8–10 minutes, until cheese is melted and bubbly.
- Serve warm and enjoy your spooky mini pizzas!
Notes
- Tip: For crisper crust, bake a minute longer until edges are lightly golden.
- Want extra crispy bottoms? Pre-bake tortillas for 2 minutes before adding toppings.
- Store leftovers covered in the fridge for up to 2 days; reheat briefly in a warm oven.
- Prep Time: 10 minutes
- Cook Time: 13 minutes
- Category: Appetizer
- Method: Bake
- Cuisine: American
Nutrition
- Serving Size: 1 mini pizza
- Calories: Approximately 210
- Sugar: Approximately 2 g
- Sodium: Approximately 300 mg
- Fat: Approximately 10 g
- Saturated Fat: Approximately 6 g
- Unsaturated Fat: Approximately 4 g
- Trans Fat: 0 g
- Carbohydrates: Approximately 22 g
- Fiber: Approximately 1 g
- Protein: Approximately 10 g
- Cholesterol: Approximately 15 mg
Keywords: Easy Mini Halloween Pizzas, Halloween pizzas, mini spooky pizzas, kid-friendly Halloween snacks, cheesy Halloween bites