Christmas Cookies have always been my passport into holiday kitchens, even as a professional chef juggling recipe development and televised shoots. When the calendar tightens and the to-do list explodes, I reach for a sturdy, crowd-pleasing treat that travels well, stays chewy, and dazzles with a playful mix of festive bites. This recipe—best kitchen sink Christmas Cookies—lets me swap in whatever is in the pantry, from pretzels to holiday candy, while delivering a warm, bakery-worthy bite that feels both nostalgic and modern. In this article, you’ll discover how to assemble a chewy, festive batch that busy families can bake, share, and savor together. Let’s dive into Christmas Cookies magic.
Table of Contents
What makes this Christmas Cookies special
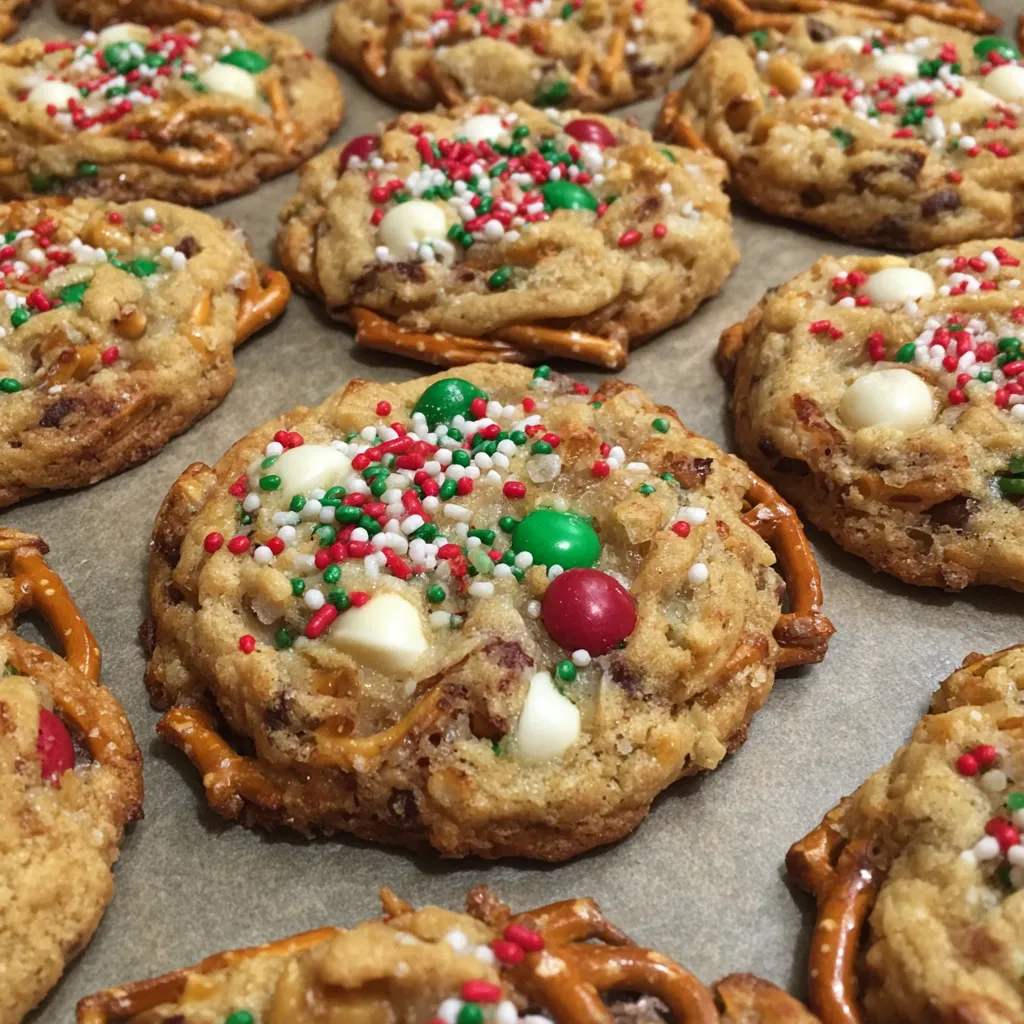
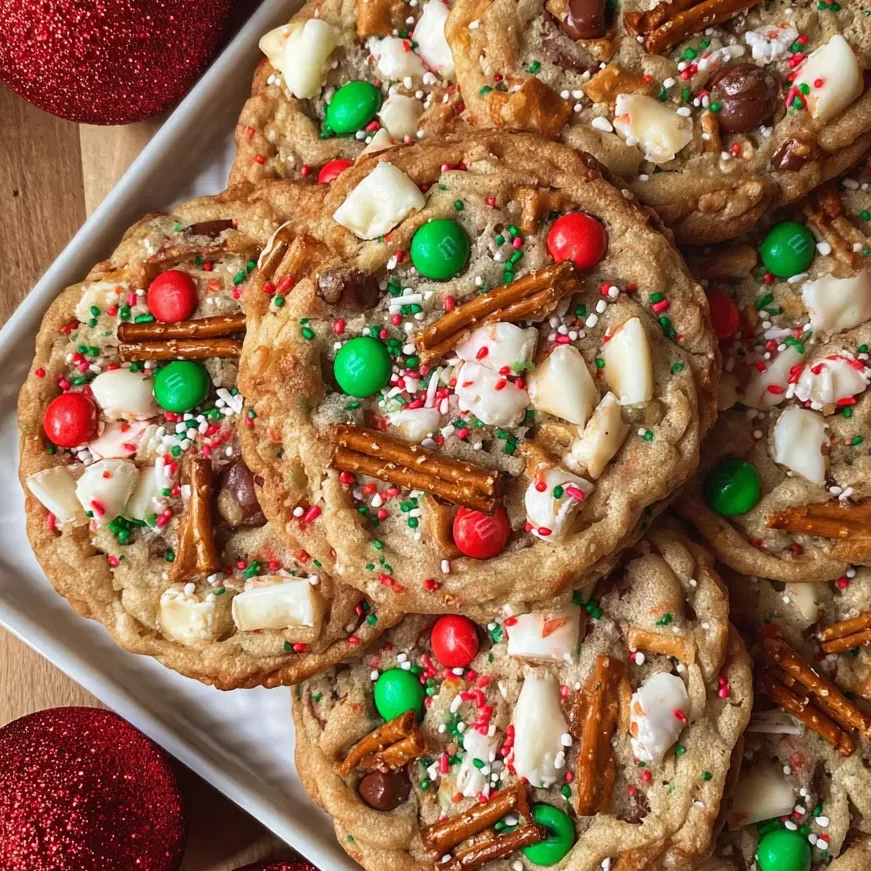
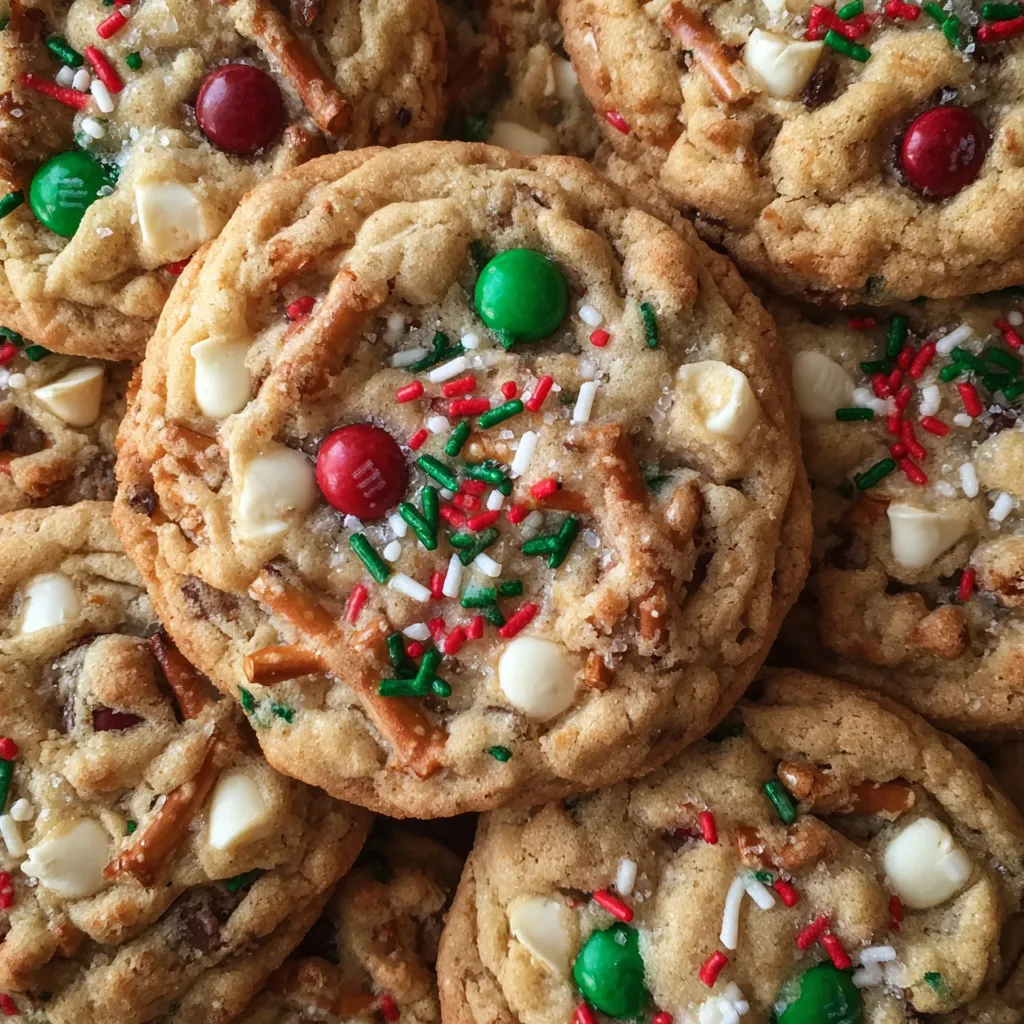
Christmas Cookies have always felt like a warm hug from the oven, especially when my schedule storms with meetings and shoots, and I need something reliable that travels well and still feels festive. This kitchen sink version—packed with pretzels, potato chips, M&M’s, white chocolate, and holiday sprinkles—lets me swap in whatever’s in the pantry, delivering a chewy, bakery-worthy bite without a single ingredient panic. I love that it’s cozy and modern at once, a recipe that makes busy days feel doable, sparks joy at gatherings, and leaves room for personal tweaks as soon as the oven clock starts ticking.
A Busy-Day Solution
On busy days, I prep in the morning and bake later, knowing a warm, chewy batch will vanish fast. The dough holds up in the fridge for a quick re-bake, making weeknights a touch sweeter. It’s a solution that keeps the holiday spirit intact, with minimal fuss.
Texture and Flavor Highlights
Chewy cookies with a little crunch from the chips and pretzels balance the sweetness with a salty edge. The white chocolate and M&M’s flash like tiny ornaments, while the sprinkles add a festive sparkle. Together, they deliver the cozy, nostalgic aroma of December and a modern, kid-friendly bite.
Why You’ll Love This Christmas Cookies
Christmas Cookies make busy days feel incredibly doable.
I love that Christmas Cookies stay flavorful yet simple.
It’s a warm, reliable hug when time runs short.
Chewy, Crowd-Pleasing Appeal
Chewy, soft centers stay kid-friendly and inviting, I think.
They’re easy to love, easy to share, and easy to gift.
Christmas Cookies bring warmth to the table for everyone.
Ingredients
I stock pantry staples so Christmas Cookies stay reliable. My kitchen stays ready for busy days. This batch slips together with ease and sparkle.
I keep a kitchen sink mindset, blending whatever’s in reach. The result is a batch that tastes festive and comforting. It’s forgiving and flexible for busy schedules.
This recipe uses a mix of structure, chew, and festive crunch. Each ingredient plays a tiny role in flavor, texture, and aroma. Exact quantities are printed at the bottom of the article for easy printing.
- 2 ½ cups all-purpose flour
- 1 tsp baking soda
- ½ tsp baking powder
- ½ tsp salt
- 1 cup unsalted butter, softened
- ¾ cup brown sugar
- ½ cup granulated sugar
- 2 large eggs
- 2 tsp vanilla extract
- ½ cup crushed pretzels
- ½ cup crushed potato chips
- ½ cup red and green M&M’s
- ½ cup white chocolate chips
- 2 tbsp holiday sprinkles
Each item has a purpose: flour builds structure, butter and sugars add chew and browning, and the mix-ins bring festive sparkle. Optional/tips follow to tailor your batch to tastes and needs.
Optional/tips:
- Swap in peanut butter chips or chopped nuts for crunch
- Use dairy-free butter and vegan chocolate chips for a dairy-free version
- For a gluten-free option, try a 1-to-1 gluten-free all-purpose flour blend (note changes in texture)
- Add crushed peppermint candies for a seasonal twist
How to Make Christmas Cookies
Step 1: Preheat and Prep
I start by preheating the oven to 350°F and lining two baking sheets with parchment. Having everything measured and ready keeps the day calm, a trick I learned early in busy kitchens. I pull out the butter to soften, too, so I’m not scrambling when the timer starts.
While the oven wakes up, I grab a medium bowl for dry ingredients and a large bowl for the butter-sugar mix. Reading the recipe aloud helps me catch any missing pieces, especially when guests are arriving soon. This prep sets the stage for chewy, festive Christmas Cookies.
Step 2: Whisk Dry Ingredients
In a medium bowl, I whisk together flour, baking soda, baking powder, and salt until evenly distributed. Sifting can help, but a good whisk does the trick for these cookies. I’m aiming for a light, airy mix that won’t resist the mixer later.
Set the bowl aside so the dry mix stays ready. When I bake with kids, I label it “Dry Mix” to avoid mix-ups. This step keeps the texture consistent for Christmas Cookies.
Step 3: Cream Butter and Sugars
In a large bowl, I beat the softened butter with brown sugar and granulated sugar until the mixture is light and fluffy. The color lightens and the scent turns caramel-y as the sugars dissolve. This is the secret to chewy centers that stay soft even after cooling.
I scrape the bowl once or twice so nothing hides from the mixer. If you’re doing this by hand, take a moment to relax your wrists and whisk away. The beat-and-scrape routine is the heartbeat of Christmas Cookies.
Step 4: Add Eggs and Vanilla
I add eggs one at a time, beating well after each addition, then stir in the vanilla. Room-temperature eggs mix more evenly and help build a smooth batter. I stop and peek at the gloss—this is where the Christmas Cookies start to look bakery-worthy.
If the batter looks a touch glossy, don’t panic; a few breaths help. Consistency matters more than speed here. I remind myself this is still magic, not a science fair.
Step 5: Combine Wet and Dry
Gradually add dry ingredients to the wet, mixing on low until just combined. Overmixing activates gluten and makes cookies tough, so I stop as soon as you see a streak or two. A shaggy dough that’s ready for mix-ins is the goal here.
If the dough feels stiff, a 5-minute rest helps it relax. Now you’re ready for the show-stoppers—the festive mix-ins. I always reserve a bite or two for tasting, naturally.
Step 6: Fold in Mix-Ins
Fold in pretzels, crushed potato chips, M&M’s, white chocolate chips, and holiday sprinkles. Be gentle so you don’t break the chips or mash the candy. Stir until the bits are evenly distributed.
If you crush the chips too fine, you’ll lose crunch. If you leave large pieces, they’ll poke through the dough. Aim for a balance so every bite feels festive.
Step 7: Chill Dough for Chew
Chill the dough for at least one hour; the flavors have time to marry and the chew deepen. If you’re pressed for time, you can chill in the freezer for 20 minutes, though the longer the better. Dough that’s rested bakes into cookies with thicker, chewier centers.
You can chill for up to 2 days in the fridge if you plan ahead. Portion out dough balls so you can bake in minutes when guests drop by. This is my cheat code for holiday spontaneity.
Step 8: Scoop, Bake, and Cool
Scoop two tablespoons of dough per cookie and place on the prepared sheets, spacing about 2 inches apart. Bake for 11 to 13 minutes, until the edges are golden but the centers stay soft. Let them rest on the sheet for 5 minutes before transferring to a wire rack.
Cool completely before storing or gifting, so the texture sets. If you’re freezing, freeze baked cookies in a single layer first, then bag for later. This method keeps Christmas Cookies chewy, fresh, and ready for holiday sharing.

Tips for Success
- Chill time matters: a longer chill enhances chewiness for Christmas Cookies.
- Don’t overmix after adding dry ingredients to keep them tender.
- Use parchment paper for easy release and clean sheets.
- Space cookies 2 inches apart to prevent spreading.
- Bake until edges are lightly golden for chewy centers.
- Let cookies rest briefly on the sheet before transferring for Christmas Cookies.
Equipment Needed
These tools help me bake Christmas Cookies quickly, even on busy days.
- Mixing bowls, wooden spoon, or mixer
- Two baking sheets with parchment paper
- Cooling rack
- Measuring cups and spoons
- Optional: cookie scoop for uniform Christmas Cookies
Variations
These variations keep Christmas Cookies fresh and flexible. I love adapting them to what I have on hand.
- Swap pretzels or potato chips for toasted pecans or almonds to add a nutty crunch.
- Use dark chocolate chips or milk chocolate chips in place of white chocolate for richer flavor.
- Add crushed candy canes for a peppermint Christmas Cookies twist.
- Try mini marshmallows and crushed cranberries for a festive bite.
- For dairy-free: use plant-based butter and dairy-free chips.
- Gluten-free option: use a 1-to-1 gluten-free flour blend and give the batter a touch more mixing time.
Serving Suggestions
I love pairing these Christmas Cookies with warm drinks. Hot cocoa, a cinnamon latte, or mulled cider make a festive duo. They turn a snack into a small celebration.
- Serve with hot cocoa, cinnamon latte, or mulled cider
- Arrange on a festive platter with ribbons for gifting
- Dust with extra sprinkles for a personalized touch
- Pack in tins for easy holiday gifts
Gift-Giving and Storage
After baking, I love keeping Christmas Cookies fresh with a few simple tricks. These steps make gifting easy and spreading holiday cheer a breeze.
- Store at room temperature in an airtight container for up to 3–4 days.
- Freeze baked cookies for longer storage; layer with parchment between layers.
- For gifting, stack cookies in clear tins with tissue paper and a festive tag.
- Make-ahead option: freeze dough balls; bake just before guests arrive.
- Yield is about 24 cookies; size may affect the total yield.
With these tips, you can rotate batches through the season. They stay fresh, chewy, and ready to share.
FAQs
Can I freeze Christmas Cookies dough or baked cookies?
I freeze dough balls for 2–3 months, and baked cookies for up to 1 month. Thaw in fridge overnight or at room temp. Refresh by a quick warm-up in a 300°F oven for that just-baked feel.
How do I keep Christmas Cookies chewy after baking?
Chill the dough, don’t overmix, and bake until edges are set but centers stay soft. Store in an airtight container with a piece of bread or a slice of apple for moisture.
Can I make a dairy-free or gluten-free version of Christmas Cookies?
Yes. Use dairy-free butter and chips, and a gluten-free flour blend. Follow package guidance for best results, especially for texture.
How should I store Christmas Cookies after baking?
Cool completely, then stack with parchment between layers and seal in a container. They keep 3–4 days at room temp, longer if frozen.
Final Thoughts
From the first bite to the last crumb, Christmas Cookies layer holiday warmth into every bite. This kitchen-sink approach gives me the freedom to improvise with what’s in the pantry while still delivering a chewy, crowd-pleasing treat. It’s the kind of dessert that makes busy homes feel cozy.
I keep a batch of Christmas Cookies on hand for quick gifts, casual gatherings, or a cozy afternoon with hot drinks. These cookies make spreading cheer feel effortless, turning ordinary moments into small, shining rituals that last well past December. Happy baking and warm memories to you and your loved ones.
Print
Christmas Cookies: 5 Ultimate Delicious Chewy Delights.
- Total Time: 1 hour 33 minutes
- Yield: 24 cookies 1x
- Diet: Vegetarian
Description
Christmas Cookies are a festive, crowd-pleasing treat—these Best Kitchen Sink Christmas Cookies combine sweet, salty, crunchy, and chewy elements in every bite, loaded with pretzels, potato chips, M&M’s, white chocolate, and holiday sprinkles.
Ingredients
- 2 ½ cups all-purpose flour
- 1 tsp baking soda
- ½ tsp baking powder
- ½ tsp salt
- 1 cup unsalted butter, softened
- ¾ cup brown sugar
- ½ cup granulated sugar
- 2 large eggs
- 2 tsp vanilla extract
- ½ cup crushed pretzels
- ½ cup crushed potato chips
- ½ cup red and green M&M’s
- ½ cup white chocolate chips
- 2 tbsp holiday sprinkles
Instructions
- Preheat oven to 350°F (175°C) and line two baking sheets with parchment paper.
- In a medium bowl, whisk together flour, baking soda, baking powder, and salt.
- In a large bowl, cream butter, brown sugar, and granulated sugar until light and fluffy.
- Add eggs and vanilla, mixing until smooth.
- Gradually add dry ingredients to wet ingredients and mix until just combined.
- Fold in pretzels, potato chips, M&M’s, white chocolate chips, and sprinkles.
- Scoop 2 tablespoons of dough per cookie and place on prepared sheets, spacing 2 inches apart.
- Chill cookie dough balls for 1 hour before baking for extra chewy cookies.
- Bake for 11–13 minutes, until golden at the edges and soft in the center.
- Let cool for 5 minutes before transferring to a wire rack to cool completely.
Notes
- Chill the dough balls for an hour to maximize chewiness.
- Customize with your favorite mix-ins; swap in different candies or chips as desired.
- Store cookies in an airtight container at room temperature for up to 3–4 days, or freeze for longer storage.
- Yield is approximately 24 cookies; size may affect the total yield.
- Prep Time: 20 minutes
- Cook Time: 13 minutes
- Category: Cookies
- Method: Bake
- Cuisine: American
Nutrition
- Serving Size: 1 cookie
- Calories: 165 (approx.)
- Sugar: 14–18 g (approx.)
- Sodium: 120–170 mg (approx.)
- Fat: 9 g (approx.)
- Saturated Fat: 5 g (approx.)
- Unsaturated Fat: 4 g (approx.)
- Trans Fat: 0 g (approx.)
- Carbohydrates: 21 g (approx.)
- Fiber: 1 g
- Protein: 2 g
- Cholesterol: 18 mg
Keywords: Christmas Cookies, chewy cookies, kitchen sink cookies, holiday cookies, festive cookies