
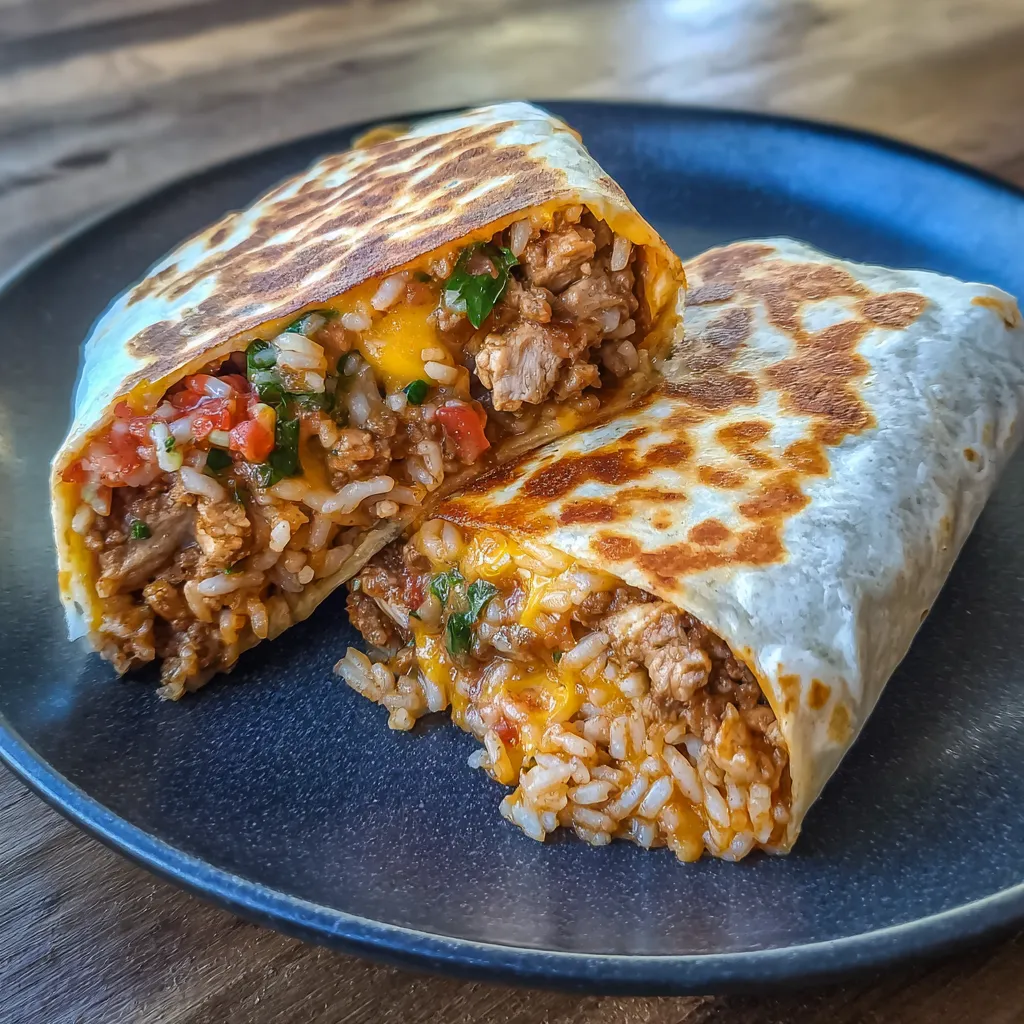
Grilled Cheese Burrito fans, this is the weeknight lifesaver you’ve been waiting for. I’m a chef who runs a busy kitchen while also keeping family meals cozy and comforting, and this Grilled Cheese Burrito is my 5-step shortcut to big flavor with minimal fuss. Picture a crunchy, cheesy crust wrapping a stunning core of seasoned beef, fluffy rice, and nacho-cheese goodness—all in one portable, melt-in-your-mouth bite. If you’re a busy mom or a professional juggling deadlines, you deserve a dish that feels like a hug and still hits the table fast. Let’s dive into a step-by-step plan that delivers Crave-Worthy Grilled Cheese Burrito magic, without sacrificing time.
Table of Contents
what make this Grilled Cheese Burrito special
Grilled Cheese Burrito is the weeknight hug I reach for when plans stall. I’m a busy home cook who loves big flavors without big chaos. This dish feels like a warm coat on a chilly night. Crunchy on the outside, gooey on the inside, and ready in a snap. It’s perfect for quick solutions on full days, or when you want to impress without stressing. You get comfort-food joy with weeknight speed—beef, rice, nacho cheese, all in a single bite. It’s the kind of dish you reach for again and again.
Grilled Cheese Burrito: a cozy, crowd-pleasing mashup
This mashup blends cozy grilled cheese vibes with riffed taco-night fillings. It satisfies comfort-food cravings and weeknight efficiency in one handheld package. The kids love the crunchy crust, while grownups savor the rich beef and cheese.
Balancing gooey cheese with savory beef and rice
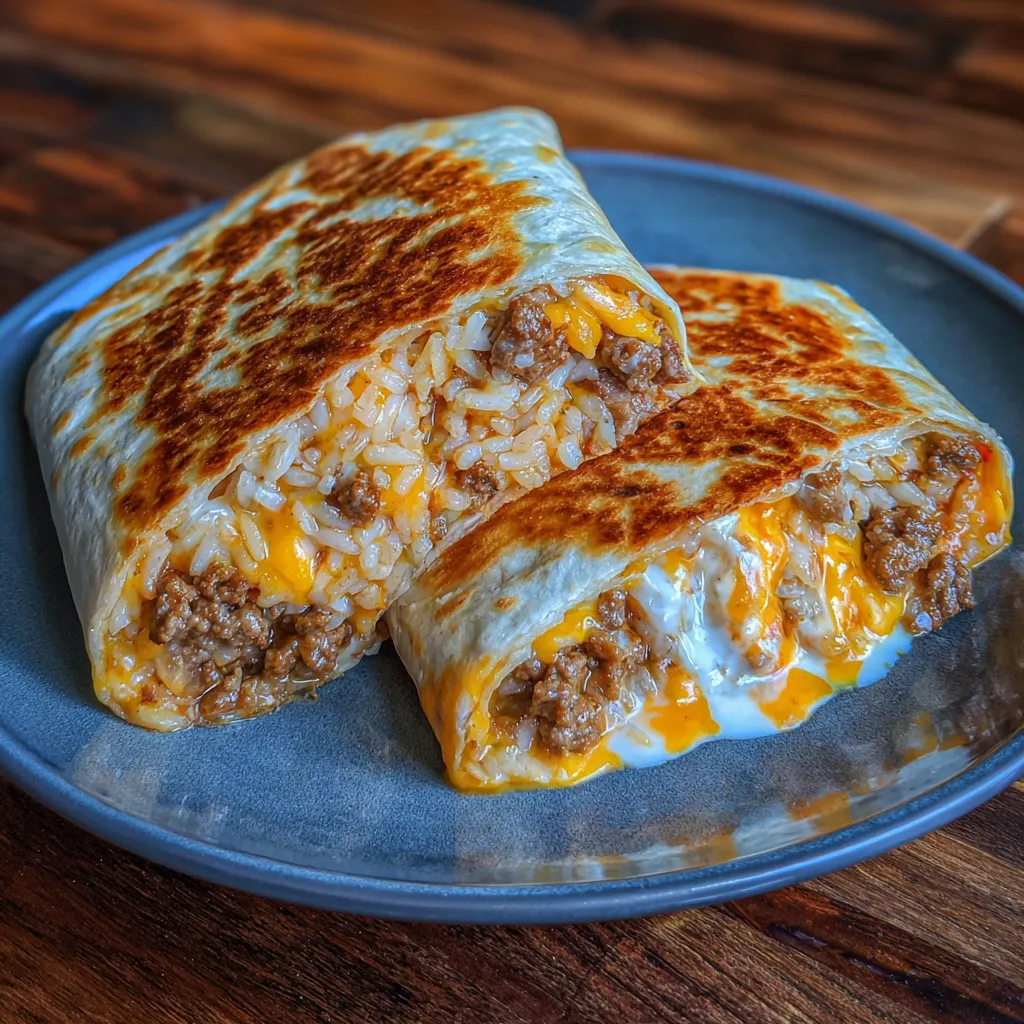
Think of it as layers of texture you can bite through. Crisp tortillas form a golden crust, while the beef, rice, and nacho sauce stay creamy. Keep the filing ratio balanced so every bite feels like the same hug.
Weeknight-friendly method in five steps
Five simple steps take you from pantry to plate in minutes. Prep smart, cook steady, and finish with a crisp cheese crust. If time is tight, you can assemble fillings ahead and roll quickly.
Why You’ll Love This Grilled Cheese Burrito
I reach for this Grilled Cheese Burrito on busy weeks. It delivers big flavor without big chaos. Crispy crust, gooey cheese, and seasoned beef feel like a hug. It’s fast, forgiving, and crowd-pleasing for picky eaters and busy families. Plus, leftovers rehearse into easy lunches. This is weeknight magic you can count on. I love how it gives me more time for the people around me.
Grilled Cheese Burrito flavor that comforts in every bite
First, the flavor starts with melty cheese that pools like sunshine. Then comes seasoned beef with taco warmth and a hint of chili. Nacho cheese sauce drapes the mix in creamy, comforting richness. The tortillas waft with toasty aroma as they crisp. Aromatic onions or cilantro optional—my kids love the plain version.
Grilled Cheese Burrito efficiency for busy days
On busy days, this dish shines with minimal prep. Most steps finish in one pan, saving cleanup and time. With a quick 25-minute window, you serve a hot, comforting dinner. Everyone feels satisfied yet still ready for bedtime or meetings.
Grilled Cheese Burrito family appeal
Leftovers taste surprisingly good the next day, cold or reheated. Kids happily request seconds, and adults appreciate a no-fuss lunch. Wraps stay intact, flavors deepen, and your week feels lighter.
Ingredients
This is the precise lineup for the Grilled Cheese Burrito—the exact quantities you need to pull off that crispy outside and gooey inside. I like to keep these staples on hand for weeknights when flavor matters most and time is short.
Core ingredients for the Grilled Cheese Burrito
- 1 lb ground beef — browned and seasoned for the savory core.
- 1 packet taco seasoning — brings taco-night brightness to the beef.
- ½ cup water — helps the beef simmer to a thick, saucy finish.
- 2 cups cooked rice — fluffy base that soaks up flavors.
- 1 cup nacho cheese sauce — creamy, melty goodness to bind the layers.
- 1 cup shredded cheddar or Mexican blend cheese — melts into a luscious, cohesive filling.
- ½ cup sour cream — tangy creaminess to balance heat.
- ½ cup tortilla strips — optional for a crunchy surprise.
- 4 large flour tortillas — the sturdy wraps that hold it all.
- 1 cup shredded cheese — for the cheese crust when grilling outside.
Optional add-ins and substitutions
- Ground turkey or plant-based crumble — lighter or vegetarian-friendly version.
- Quick-cooked black beans or pinto beans — extra fiber and protein.
- Additional nacho cheese sauce or salsa verde — for different heat and brightness.
Print-friendly notes
Exact quantities are listed here and at the bottom of the article for printing. This section is designed to be handy for quick shopping and prep checks.
How to Make Grilled Cheese Burrito
Step 1: Grilled Cheese Burrito prep
First, gather all ingredients and set them within reach.
I like to line them up in order on the counter.
Warm the tortillas briefly so they fold easily.
This prep makes the rest of the steps smooth and fast, perfect for busy evenings.
Step 2: Brown beef and season
Next, cook the beef in a skillet over medium heat until browned.
I drain the fat to keep the filling lighter.
Stir in the taco seasoning and ½ cup water.
Step 3: Build the fillings for each burrito
In the center of each tortilla, layer seasoned beef, rice, and nacho cheese sauce.
Then add shredded cheese, sour cream, and tortilla strips if you like.
I keep the fillings balanced for even bites.
Step 4: Fold and roll each burrito
Fold in the sides and roll tightly.
Seal the edges so the filling stays put.
I tuck the roll snug as a gift.
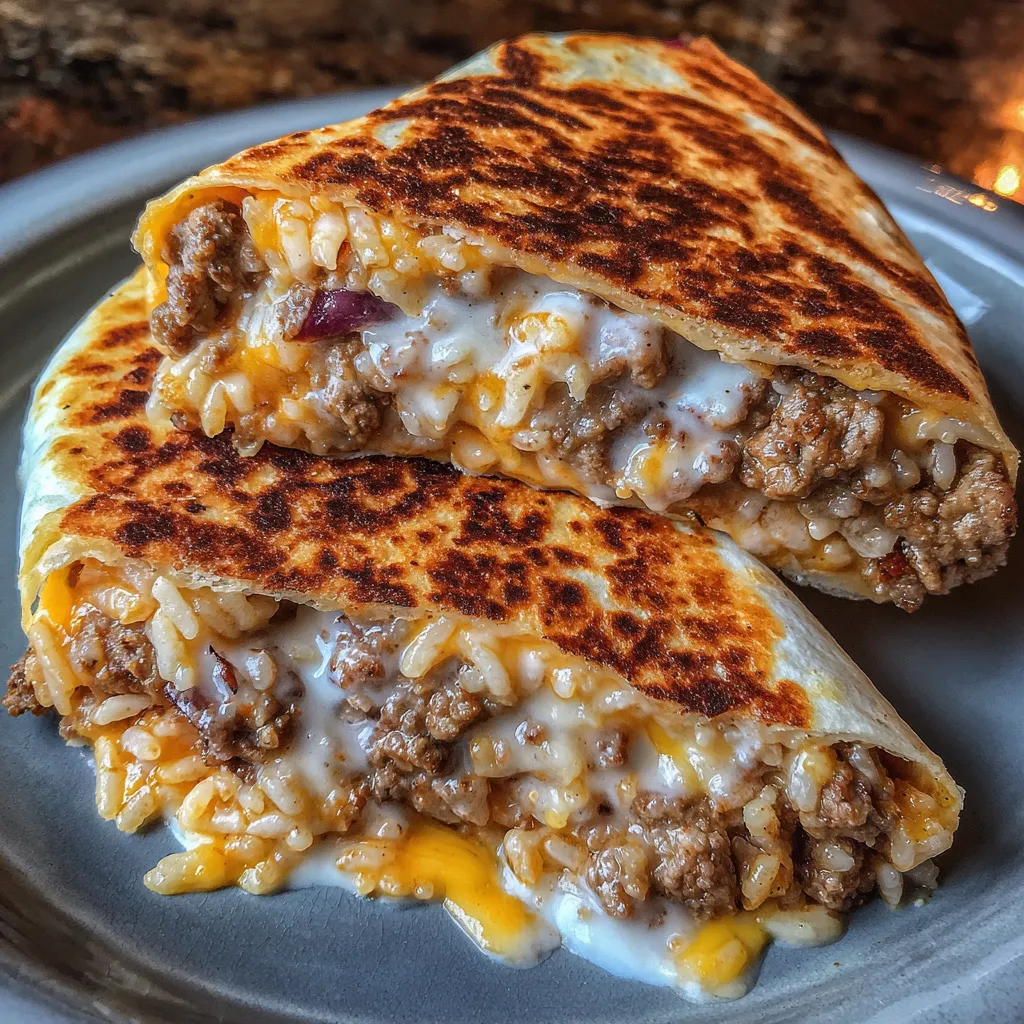
Step 5: Create a cheese-crust finish
Heat a clean skillet over medium.
Spread a thin rectangle of shredded cheese in the pan, larger than the burrito.
Place the burrito seam-side down and toast until the crust forms.
My favorite part is watching the cheese crust glow.
Step 6: Finish, rest, and slice
Toast the burrito on both sides for 1–2 minutes each.
Let it rest 1–2 minutes before slicing.
Finally, slice and serve with extra nacho cheese.
Tips for Success
Prepping and timing tips
- Map out a 25-minute window for the Grilled Cheese Burrito; multitask smart.
- Line ingredients on the counter in order.
- Warm tortillas just before folding.
Cheese tips for a crisp, golden crust
- Spread a thin cheese layer on the pan.
- Press gently for a tight crust.
- Toast 1–2 minutes per side.
Assembly tips
- Layer fillings in a consistent order.
- Center the filling for even bites.
- Seal edges tightly to keep filling in.
Equipment Needed
Tools for grilling and finishing
- Skillet or nonstick pan (any sturdy, flat-bottom pan works)
- Spatula
- Tongs
- Heat-safe gloves or oven mitts (for handling hot burritos safely)
Optional upgrades
- Nonstick sheet or cast-iron skillet for the best crust
- Tortilla warmer or microwave to soften tortillas quickly
Variations
Tex-M-Mex twist variations
- Add jalapeños—fresh or pickled—into the beef as it browns for a kick.
- Stir in pico de gallo or salsa verde to brighten flavors.
- Try spicier nacho cheese sauce or smoky queso for depth.
- Finish with cilantro and a lime squeeze for brightness.
Health-forward swaps
- Choose lean beef or swap to turkey for less fat.
- Use reduced-fat cheese and Greek yogurt instead of sour cream.
- Boost fiber with extra beans or switch half the rice to cauliflower rice.
Vegetarian Grilled Cheese Burrito
- Replace beef with plant-based crumbles or seasoned beans for protein.
- Add sautéed mushrooms and roasted peppers for umami and texture.
- Top with avocado or vegan cheese for creaminess.
Serving Suggestions
Pair your Grilled Cheese Burrito with bright sides and a refreshing sip.
Great sides to complement
- Fresh salad with light vinaigrette
- Tortilla chips and salsa
- Black beans with lime
- Roasted corn
Drinks pairing
- Agua fresca with citrus
- Lime water
- Light beer (adults)
- Sparkling water with lime
Plating tips
- Slice on a warm plate
- Drizzle with extra cheese sauce
- Garnish with cilantro (optional)
Make-Ahead Grilled Cheese Burrito: Meal-Prep Tips
Preparing in advance
I start by assembling the burritos with fillings prepped.
Lay them on parchment, then wrap tightly in foil.
Refrigerate for up to one day, or freeze for longer.
For longer storage, freeze burritos flat.
Wrap tightly and place in a freezer bag.
Label with date and contents for easy reheating.
When you’re ready to use them, thaw in the fridge overnight.
Or cook from frozen, adding a few extra minutes.
Your Grilled Cheese Burrito will still shine.
Reheating for best texture
Reheat to revive the crust and melt.
Microwave with a damp paper towel for 60–90 seconds.
Or re-toast in a skillet 2–3 minutes per side.
Let it rest 1 minute after heating to settle the cheese.
Slice and serve immediately while it’s oozy.
If it cools, re-toast briefly to refresh.
I like finishing with salsa or sour cream after reheating.
It adds brightness and keeps the filling juicy.
It also helps clean plates and smiles.
When to freeze
Best to freeze pre-assembled burritos after filling, but before final toasting.
Wrap tightly and seal in freezer bags or containers.
Label with date and serving size for easy planning.
Freeze up to 2–3 months for best texture.
Thaw overnight in the fridge before reheating.
If time is tight, reheat from frozen, adding a few extra minutes.
FAQs
Can I make this Grilled Cheese Burrito ahead of time?
I love this for busy nights. You can assemble burritos, wrap them tightly, and refrigerate for up to one day. For longer storage, I freeze pre-assembled burritos, but not toasted yet. Label and date so you know what you’re pulling out.
When you’re ready to serve, thaw in the fridge overnight if possible. Reheat in a skillet or microwave with a damp paper towel. The texture may soften, but a quick finish on the stove will bring back that crisp cheese crust.
Can I make a vegetarian or lighter version?
Absolutely. I swap in plant-based crumbles or seasoned beans for the beef. You’ll still get that beefy taco-night vibe with plenty of flavor.
For a lighter Grilled Cheese Burrito, I use lean ground turkey or reduced-fat cheese and Greek yogurt in place of sour cream. Add sautéed mushrooms or peppers for extra texture and protein.
How should I reheat leftovers for best texture?
Microwave method is quick. I place leftovers on a plate, cover with a damp paper towel, and heat 60–90 seconds. Rest 1 minute before slicing.
Skillet method revives the crust. Re-toast in a dry or lightly oiled pan for 2–3 minutes per side. If you can, finish with a quick cheese crust in the pan for that signature bite.
What cheese melts best for the crust finish?
Medium-fat cheddar is my trusty go-to. It melts smoothly and crisps nicely on the pan.
A cheddar-Monterey Jack blend works even better for a glossy crust. Avoid very low-fat cheeses that don’t melt well. Shred fresh from the block for the best melt.
Final Thoughts
A weeknight victory the whole family will cheer for
This Grilled Cheese Burrito turns busy weeknights into cozy victories for you and your crew.
Its hug-in-a-bite vibe comes with easy steps and big flavor every night.
Tell me your tweaks; every family has its own cheese-crust magic recipe.
Encouragement to make it your own
Want more sparkle? Try toppings like jalapeños or pico de gallo tonight.
Swap beans, switch cheeses, or add mushrooms for extra texture and color.
Your kitchen, your rules—make it shine with your favorite combos every week.
Closing nudge for readers to print, save, or pin
Print this as a go-to for busy days at dinner time.
Save and pin the recipe so it’s ready when you need it—the moment.
I love hearing how you adapt it for your family tonight.

Grilled Cheese Burrito: 5-Step Ultimate Easy Delicious.
- Total Time: 25 minutes
- Yield: 4 servings 1x
- Diet: Low Fat
Description
Grilled Cheese Burrito: Cheesy on the outside, loaded on the inside—a crunchy, gooey comfort-food mashup that’s as satisfying as it sounds.
Ingredients
- 1 lb ground beef
- 1 packet taco seasoning
- ½ cup water
- 2 cups cooked rice
- 1 cup nacho cheese sauce
- 1 cup shredded cheddar or Mexican blend cheese
- ½ cup sour cream
- ½ cup tortilla strips (optional for crunch)
- 4 large flour tortillas
- 1 cup shredded cheese (for grilling outside)
Instructions
- In a skillet over medium heat, cook ground beef until browned. Drain excess fat.
- Stir in taco seasoning and water. Simmer 3–5 minutes until thickened.
- Warm tortillas slightly so they’re easy to fold.
- In the center of each tortilla, layer:
Seasoned beef
Cooked rice
Nacho cheese sauce
Shredded cheese
Sour cream
Tortilla strips (if using) - Fold in sides and roll tightly into a burrito.
- Heat a clean skillet over medium. Sprinkle a thin layer of shredded cheese directly onto the skillet in a rectangle slightly larger than the burrito.
- Place burrito seam-side down on top of the melting cheese. Cook 2–3 minutes until cheese forms a golden crust attached to the tortilla. Carefully flip and toast the other side 1–2 minutes.
- Remove, let rest 1–2 minutes, then slice and serve.
Notes
- Prep time: 10 minutes; Cook time: 15 minutes; Total time: 25 minutes.
- For extra crunch, add tortilla strips.
- Let the burrito rest for 1–2 minutes before slicing to keep its shape.
- Leftovers can be stored in the refrigerator for up to 1 day.
- Prep Time: 10 minutes
- Cook Time: 15 minutes
- Category: Main Dish
- Method: Stovetop grilling and skillet finishing
- Cuisine: Mexican American
Nutrition
- Serving Size: 1 burrito
- Calories: Approximately 970
- Sugar: Approximately 9 g
- Sodium: Approximately 1100 mg
- Fat: Approximately 60 g
- Saturated Fat: Approximately 28 g
- Unsaturated Fat: Approximately 32 g
- Trans Fat: 0 g
- Carbohydrates: Approximately 90 g
- Fiber: Approximately 4 g
- Protein: Approximately 35 g
- Cholesterol: Approximately 190 mg
Keywords: Grilled Cheese Burrito, grilled cheese burrito recipe, beef burrito, comfort food, burritos, Tex-MMex, cheesy burrito